Showing posts with label Cards. Show all posts

September 26, 2017

Halloween Crafts: Fun Toddler Cards

I helped Lil make her first Halloween cards and they came out so stinking cute. I just had to share them with you and how we made one - the cat/pumpkin card. Yeah, I know, another toddler, mother assisted, tutorial. I helped Lil make three cards. We made them all pretty much the same way.

Supplies

Scissors,
Recycled Stickers (What’s left of the sticker sheet after you remove the sticker),
Crayons,
Googly Eyes (Everything is more fun with google eyes),
Blank Card (I got Lil a 50 pack of blank cards at Michael’s, last year, to make footprint and handprint birthday cards),
Glue Stick,
Stamp Markers (Purchased at Target’s dollar aisle). 


1) Have your toddler stamp the blank card first. Lil couldn’t get a good stamped image from the stamp markers so I had to help her. They’re not the best stamp markers because they are small but they do the trick for a dollar.

2) Cut around the recycled stickers and place them on the card. I cut a group of pumpkin recycled stickers. I showed Lil how to make a pumpkin face on one of the pumpkins. I was thrilled to watch her draw her first smiley faces on the pumpkins. She added stems and a leaf to each pumpkin. Then, I let Lil doodle the card. I also taught her how to draw a bat. She drew two bats, flying near a full yellow moon she doodled. 


3) Embellish with regular stickers. I added a cat sticker on the pumpkin of Lil’s choice.


4) Have your toddler help glue the google eyes, with the glue stick. Lil has gotten better at gluing small objects because she uses a glue stick regularly, when making crafts at Preschool Storytime, at the library.

I’m sorry for not providing pictures with each step. I wasn’t planning on making a tutorial with these cards, since it was an out of the blue (totally unplanned) Halloween craft. I had so much fun helping and watching Lil make the cards; I had to share our process with you, that way you could make them by yourself or with a little artist too. 


I was going to give the card with the cat and pumpkins to a friend but I decided to keep it. Come on, the card has Lil’s first drawn smiley faces and bats. I couldn’t bare to part with it. I had Lil make another card, the one with the spider, for my friend instead. Lil made these two cards a few weeks ago. 


We have been making many Halloween themed crafts lately; Lil keeps asking me almost everyday what Halloween crafts we are going to do next. On Sunday, Lil decided she wanted to craft again before bedtime. I helped her make the candy/ghost card pictured above. Yes, I’ve created a little craft monster! 

If you missed last week's, Halloween craft post, click HERE to check it out. 


October 20, 2013

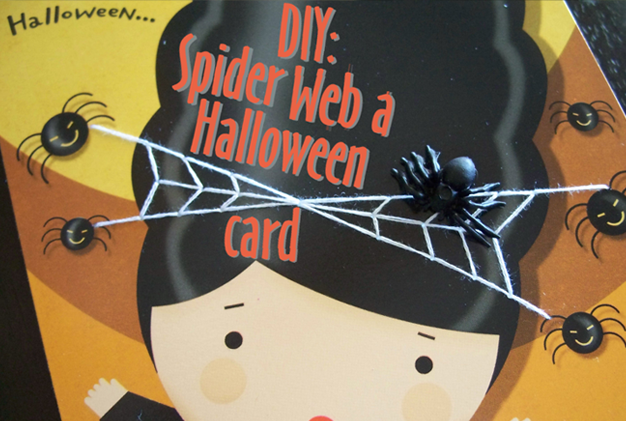
DIY Spider Web A Halloween Card

Add a little dimensional touch to a simple Halloween card and make it spooktacular, by embroidering a spider web.

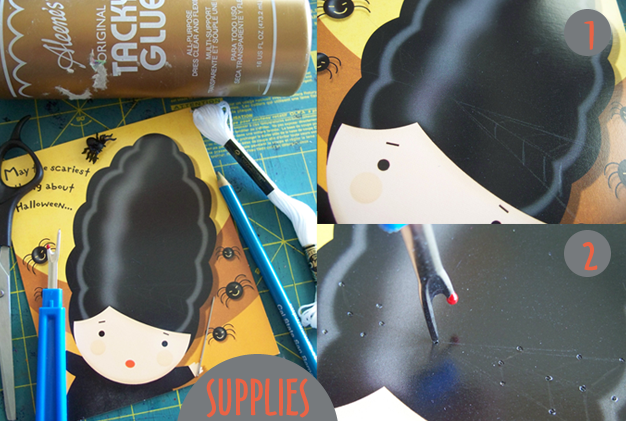
Supplies: A simple Halloween card (if it has spiders on it, the better), fake rubber spider, craft glue, scissors, seam ripper, thin sewing needle, pencil, cutting mat, and white embroidery thread (if you have glow in dark thread it’s more fun)!

Spider 1: Draw where you would like to embroider your spider web on your card. I connected my web drawing to the spiders on the card and wanted the spider web to look like a bow on the little girl’s hair. The outside of the card says, “May the scariest thing about Halloween….” inside “not be your hair.” 

Spider 2: Place your card over your cutting board. Grab your seam ripper and twist it back and forth to make holes where you will connect your stitching.
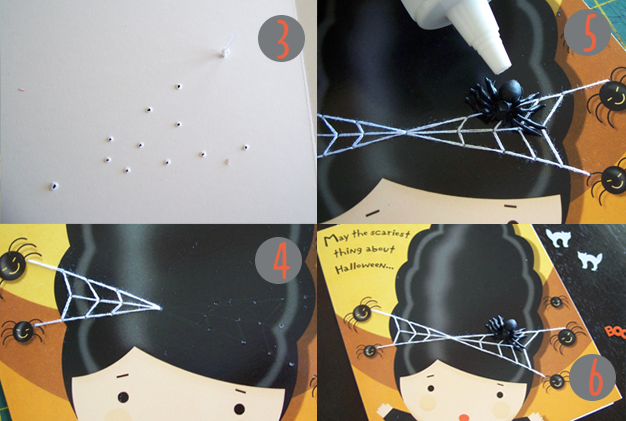
Spider 3: Use two threads, insert them in your needle, and make a knot at the end of the thread. Start sewing from the inside of the card to hide the knot.

Spider 4: Start embroidering by connecting the dots/holes.

Spider 5: Glue the fake rubber spider to your new embroidered spider web.

Spider 6: Send the Halloween card out.

I hope you enjoy this tutorial. It's very easy and only takes a few minutes. 
  

August 26, 2013

Got My Eye On Education


It has been fun seeing pictures of my friends’ children first day of school pictures on facebook. Beautiful children wearing their favorite back-to-school outfits, backpacks filled with schools supplies, and holding a sign saying, “first day of (insert grade).” Some with an eager or nervous smile as they embark into a new grade, make new friends, and fill their minds with knowledge.

I’ve also enjoyed reading the blogs of the ladies I follow as they write about how their baby cried, she cried, or how their baby walked with confidence into their class without looking back on their first day of preschool. It’s funny a mother will always be a child’s first teacher.

As I (God knows) patiently okay sometimes not so patiently wait for my turn to be a mother, I think of all the great things I’ll get to do and I can’t wait! I know I’ll be one of those mommies that balls my eyes out when my beautiful smart kid starts going to school and I’ll frame his/her artwork in our house like if it is displayed in a museum, and share some cheese and crackers with juice when he/she gets home from school to discuss what he/she learned today. I’m getting teary eyed now.

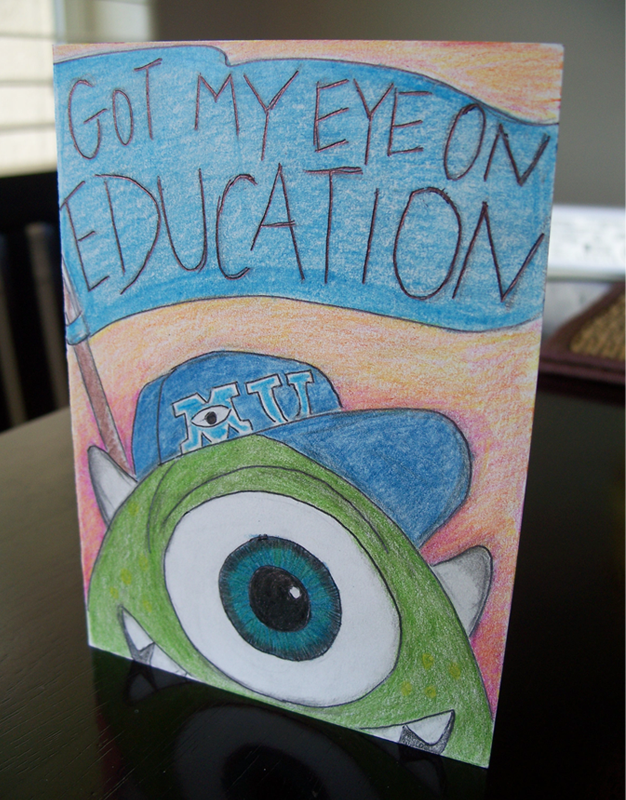
For now, I use my creativity to spoil my kids (employees) at work. When Kristal graduated with her bachelor’s degree I made her a card with a picture of Mike Wazowski in his Monsters University cap with a blue flag that says, “Got My Eye On Education.” I made my little monsters at work Monsters University I.D. pins, which they wore as our theatre played the Monsters University movie. I even changed the managers I.D.s to say faculty instead of students.

And all my bottled up motherly love goes to Belle.

July 16, 2013

From All of Us Card: Band-Aid Kit


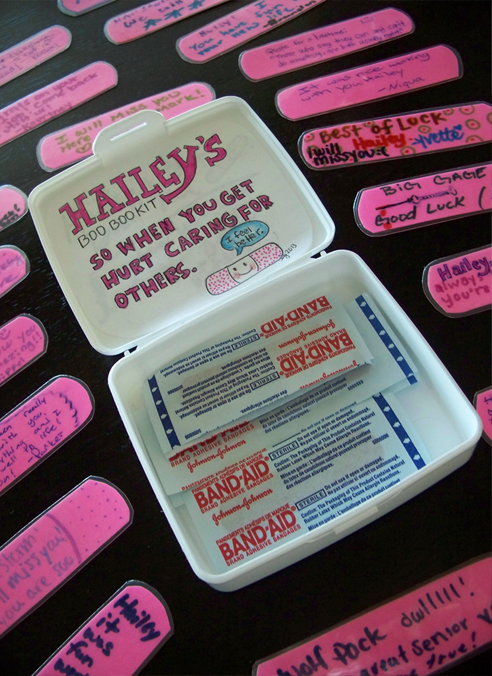
The next member to leave the Cinemark theater family, where I work, is Hailey. Hailey will be a senior this coming school year and will start her internship at a convalescent home as well. As always, when an employee gives their two weeks notice I try to make a special good-bye card just for them.

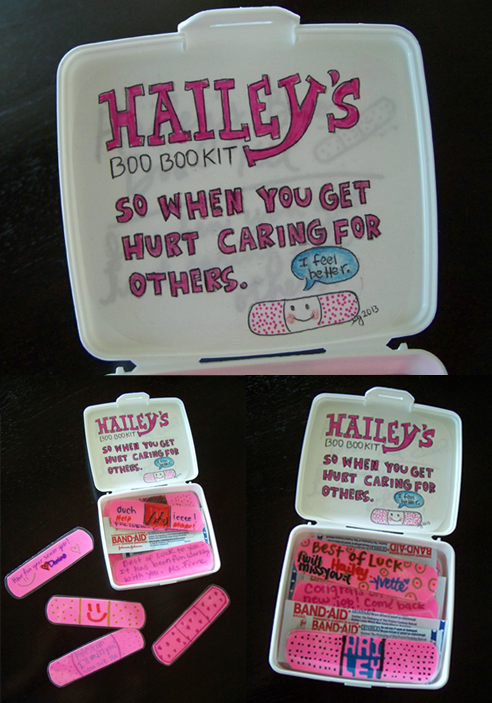
Since Hailey’s internship deals with caring for others I decided to make her a Band-Aid kit card. All the employees wrote special messages on pink paper cutout band-aids with colorful markers and some drew fun designs on the back of them. I got the band-aids laminated and put them into a Band-Aid kit I got at the 99 cent store, along with the real Band-Aids inside. On the inside of the lid box I wrote, “Hailey’s Boo Boo Kit. So when you get hurt caring for others” with a picture of a smiling band-aid saying, “I feel better” in a thought bubble, on sticker paper.

Hailey’s coworkers wrote encouraging and special messages on the pink paper band-aids. Only if real band-aids had messages like that, I think people boo boos would feel better soon.

This card is a great idea for an individual graduating from nursing school, a caregiver, a mother of a child who is accident-prone, or even a baby sitter.

June 11, 2013

Salad Card To Go

As some of you may already know, I work at a movie theater. I’ve been at my building for 4 years but with Cinemark Company for a total of 9. Just like any job you work at for a long period of time, people tend to come and go. My favorite reasons for employees having to leave is when they are trying to better themselves, either new job, going to college, having children… Oh wait, that’s the reason I hope to use someday. However, no matter their reason, I try to make he/she a special going away card that reflects their new journey or based on the things they like.

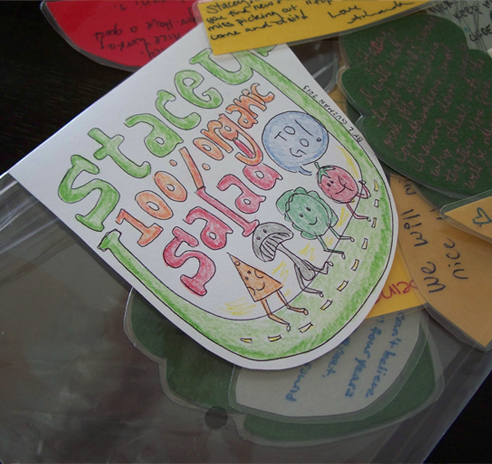
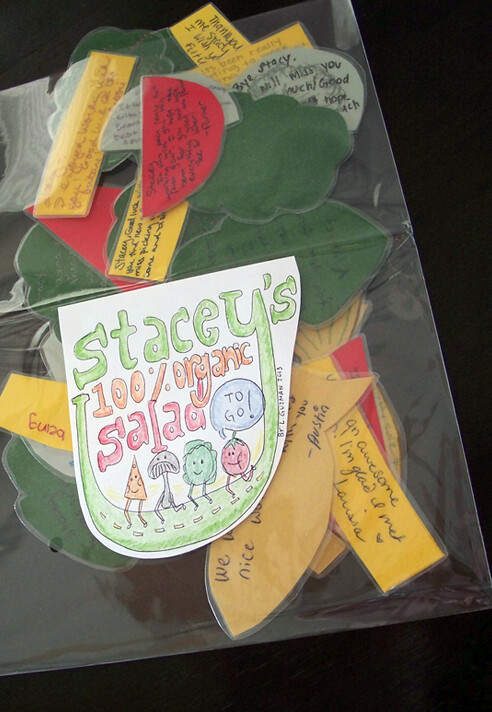
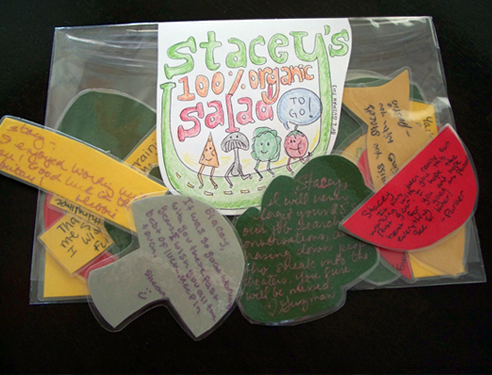
Currently, another bird flew the coup. Stacey had been employed at the theater since it opened. Stacey loves to eat healthy and 99% of the time brought a salad to eat at work. For a while, she even sold organic salads to the staff. Stacey knew my ritual of making special cards and she even told a manager she had a feeling she was going to get a salad card. And, that’s exactly what she received – Stacey’s 100% Organic Salad To Go card.

I cut out shredded cheese, cut tomatoes, slice mushrooms, lettuce, and even anchovies (one day the trashcan closest to the break room smelled like anchovies for a day) out of construction paper. I had the employees’ write their farewell wishes on them and got them laminated. I cut the laminated salad ingredients out and put them in a clear protective bag. Like the ones used when you purchase a fancy card. The salad label I created said, “Stacey’s 100% Organic Salad” and the tail of the letter y was used as a road for 4 salad pieces to run on, with the last runner saying, “To Go!” I drew the label on sticker paper.

Stacey really liked her card because salads are a part of who she is. 100% organic salads to be exact and that’s one of the qualities we will always remember her for.

October 9, 2012

It’s on its way!

I mailed my Halloween Costume Swap package today to the United Kingdom. Hopefully, I won’t have the same shipping delay I did with my last swap. It took two months to reach Canada!


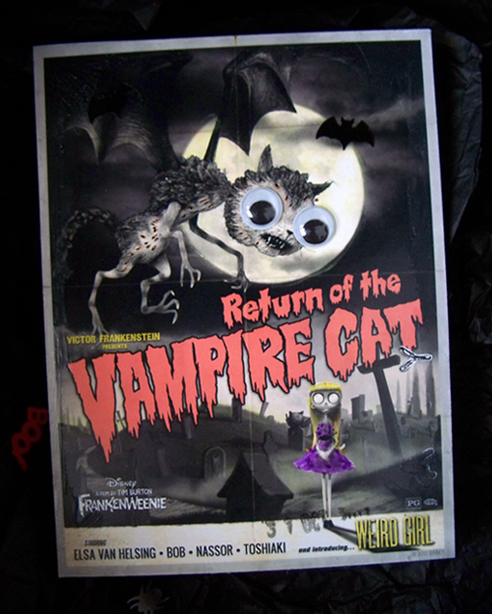
To let Amy, my Halloween swap partner, know her package is almost on its way, I sent her this postcard last week. Not sure if shes gotten it yet. At work, we were handling out Frankenweenie collectors cards to customers and I took a set for myself. I made one of the cards with a vampire cat on it into a postcard. I chose that particular card design because it kind of went with what Amy wants to be for Halloween - a vampire. I added googly eyes to the vampire cat, glued bat confetti to the card, painted the moon with glow in the dark paint, and added other fun touches.


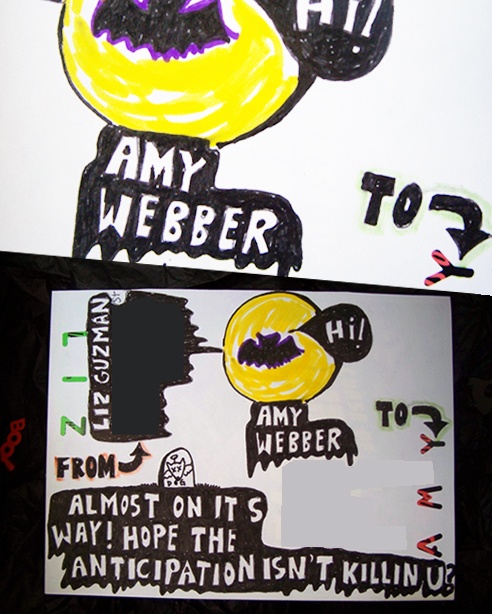
The back of the postcard is my favorite, with the text in a gooey falling substance. I used sticker paper for the back of the postcard. I whole punched our names on the sticker paper before sticking it to the back of the collector’s card. I drew a bat with a thought bubble saying, “Hi!” and behind it a moon. In one of the gooey substances, I wrote in capital letters, “ALMOST ON ITS WAY! HOPE THE ANTICIPATION ISN’T KILLIN YOU?”

I hope this postcard makes Amy excited about what’s coming her way. I know I am! About what’s coming my way too!

February 9, 2012

Because I Love My Readers


If some of you recall my blog celebrated it’s first birthday/anniversary in January and I had an anniversary gift contest for all my followers, which Jen won. I decided to give a reader a gift for giving me the gift of following my blog. I promised I would make the winner a gift made especially for them. I went onto Jen’s blog, Skinned Knees and read all her posts to get to know her. “Skinned Knees” is a very inspiration blog, “about promoting positive body image, eating disorder recovery, sex-positivity, and feminism.” Jen is a very beautiful, strong, and brave woman to share her ups and downs as she struggles with her own body image, in return teaching her readers to love themselves for who they are.

This is what I made Jen, a hand painted feel good brooch/ornament. Everything about the brooch was inspirited by her life.


I was glad to hear that Jen loved her brooch so much. The brooch, which I titled, “Beautiful You” was made with so much love because I love my readers!

Update:  Jen wrote a post, Some Well-Deserved Love, about her brooch, check it out!

September 17, 2011

DIY: Kitty’s Yarn Message Card


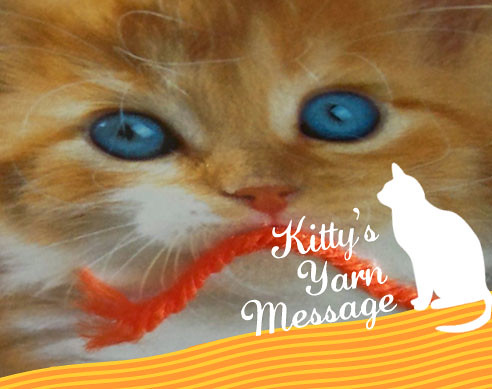
I wanted to send Andrea from Paper Sparrow a card for her birthday and not just any card. I wanted to make her a fun card. I know she loves cats. While going through my numerous cards and stationary boxes I found a blank cat card. I decided I would decorate it with a yarn message. This tutorial is perrfect for any cat lover and you can add any message you’ll like.

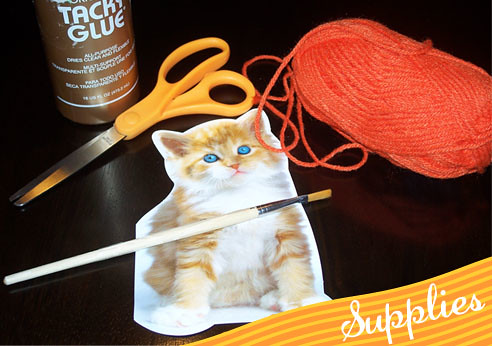
Supplies: glue, scissors, a paintbrush, cat card, and your choice of color yarn

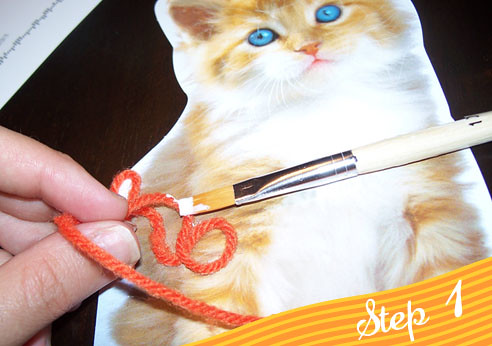
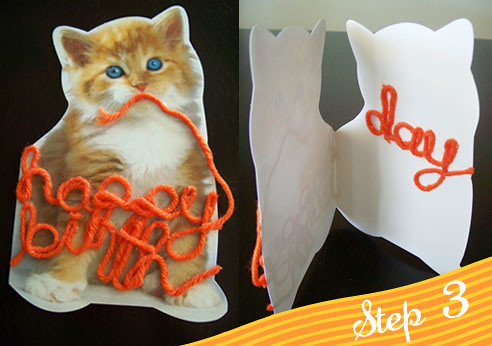
 1. Grab your yarn and twist and turn it to create the first letter on your card. Make your letters in cursive to make it look like the cat was playing with the yarn and created a message with it. After seeing what your first letter will look like, glue the back of the yarn using a paintbrush to glue together your letter onto the card. You’ll have to twist your yarn to make sure the glued part of the yarn stays in the back.

2. Once you have the yarn where you want it, as you create your letter, press down on the yard for a few seconds to make sure the yarn stays put.

 3. Repeat steps 1 and 2 until your yarn message is complete. The shorter the message the more likely that it will fit just on the front of the card. Then again there’s always more room inside.

July 13, 2011

DIY: Card Tags


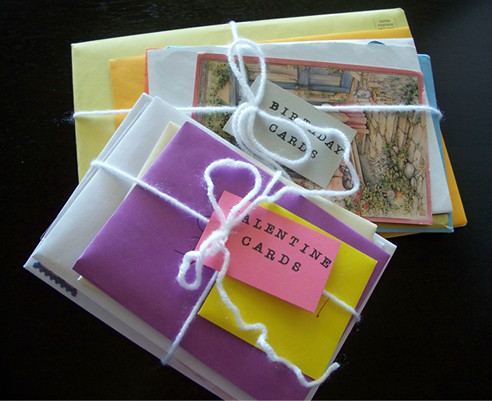
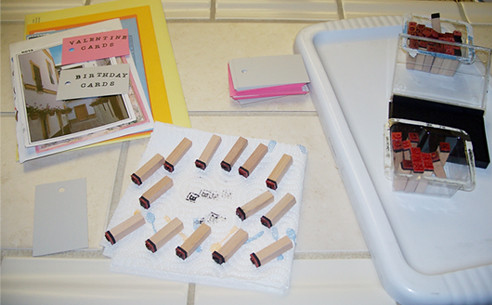
Card tags are an easy way to keep your cards organized, based on special events.

Supplies:
Blank tags (or you can make your own),
Stamps,
Ink,
Yarn


Directions:
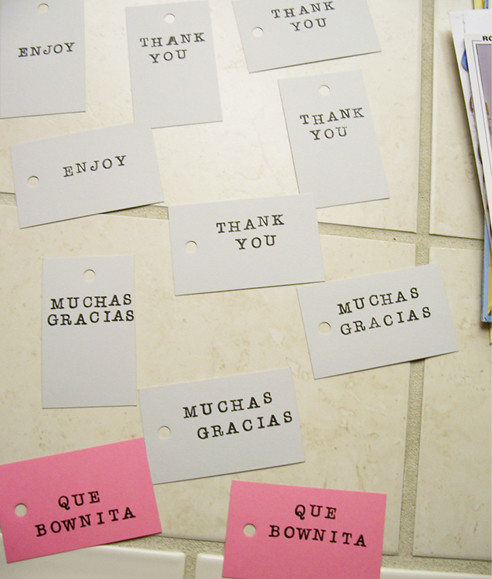
1. Stamp your tags with alphabet blocks to spell what bundle of cards you will be grouping. I.e. Birthdays cards, pen pal letters, etc.
2. Let ink dry then grab your yarn, tie it around the bundle of cards like a gift, and loop the two pieces of yarn into the hole of your tag and make a bow.


I also made some thank you tags to add to my sold Etsy items.

June 19, 2011

Happy Father's Day


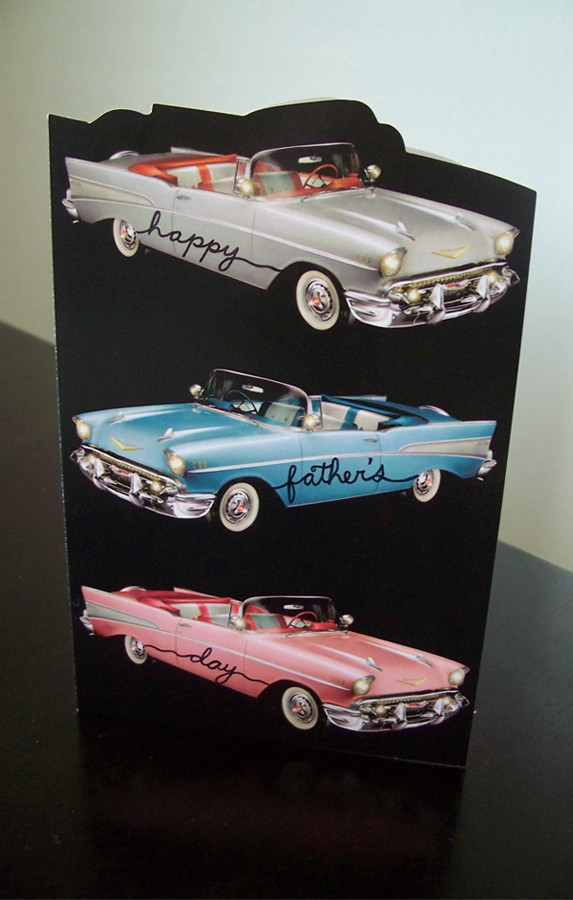
For Father’s Day my dad received this card. I turned this simple card, with a picture of 3 classic cars in the front and blank inside, into the perfect Father’s Day card for my Dad.

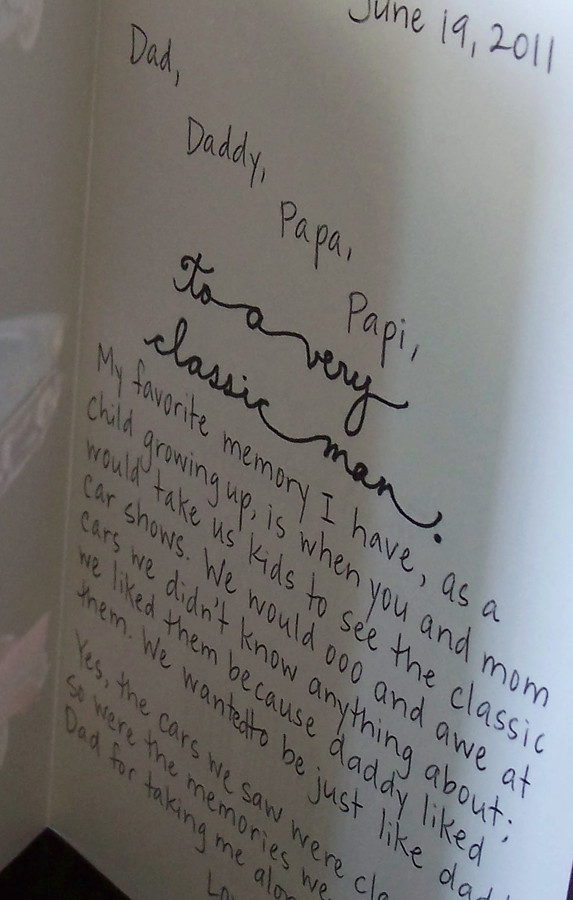
On each car I wrote a word with sharpie. Together they read, “happy father’s day.” Inside I wrote, “to a very classic man” also in sharpie.


In pen, I wrote of one of my favorite memories I shared with my father and siblings,

"Dad, Daddy, Papa, Papi,
My favorite memory I have, as a child growing up, is when you and mom would take us kids to see the classic car shows. We would ooo and awe at cars we didn’t know anything about; we liked them because daddy liked them. We wanted to be just like daddy.
Yes, the cars we saw were classic but so were the memories we made. Thanks Dad for taking me along for the fun ride.
Love you Dad!
Tu Guera,
Lizette”


Happy Father’s Day Dad!

What fond memories do you have of you and your dad?
Related Posts Plugin for WordPress, Blogger...