Showing posts with label crafts. Show all posts

September 26, 2017

Halloween Crafts: Fun Toddler Cards

I helped Lil make her first Halloween cards and they came out so stinking cute. I just had to share them with you and how we made one - the cat/pumpkin card. Yeah, I know, another toddler, mother assisted, tutorial. I helped Lil make three cards. We made them all pretty much the same way.

Supplies

Scissors,
Recycled Stickers (What’s left of the sticker sheet after you remove the sticker),
Crayons,
Googly Eyes (Everything is more fun with google eyes),
Blank Card (I got Lil a 50 pack of blank cards at Michael’s, last year, to make footprint and handprint birthday cards),
Glue Stick,
Stamp Markers (Purchased at Target’s dollar aisle). 


1) Have your toddler stamp the blank card first. Lil couldn’t get a good stamped image from the stamp markers so I had to help her. They’re not the best stamp markers because they are small but they do the trick for a dollar.

2) Cut around the recycled stickers and place them on the card. I cut a group of pumpkin recycled stickers. I showed Lil how to make a pumpkin face on one of the pumpkins. I was thrilled to watch her draw her first smiley faces on the pumpkins. She added stems and a leaf to each pumpkin. Then, I let Lil doodle the card. I also taught her how to draw a bat. She drew two bats, flying near a full yellow moon she doodled. 


3) Embellish with regular stickers. I added a cat sticker on the pumpkin of Lil’s choice.


4) Have your toddler help glue the google eyes, with the glue stick. Lil has gotten better at gluing small objects because she uses a glue stick regularly, when making crafts at Preschool Storytime, at the library.

I’m sorry for not providing pictures with each step. I wasn’t planning on making a tutorial with these cards, since it was an out of the blue (totally unplanned) Halloween craft. I had so much fun helping and watching Lil make the cards; I had to share our process with you, that way you could make them by yourself or with a little artist too. 


I was going to give the card with the cat and pumpkins to a friend but I decided to keep it. Come on, the card has Lil’s first drawn smiley faces and bats. I couldn’t bare to part with it. I had Lil make another card, the one with the spider, for my friend instead. Lil made these two cards a few weeks ago. 


We have been making many Halloween themed crafts lately; Lil keeps asking me almost everyday what Halloween crafts we are going to do next. On Sunday, Lil decided she wanted to craft again before bedtime. I helped her make the candy/ghost card pictured above. Yes, I’ve created a little craft monster! 

If you missed last week's, Halloween craft post, click HERE to check it out. 


September 19, 2017

Halloween Crafts: Cat Character Jar Kit

I’m expecting my second baby in October and I don’t feel like busting out all my Halloween decorations this year; I own more Halloween decorations than Christmas ones. The idea of putting a bunch of Halloween decorations away with a newborn and toddler sounds like a bad idea. However, I did put a few decorations up that I had stored in the house, not the garage, and decided to purchase some inexpensive Halloween kits for my daughter, Lil, instead. I love kits because they included all the supplies needed to create the craft. We started making Halloween crafts last month, since I don’t know how I will be feeling the closer my due date gets. 


The first Halloween kit I purchased was this Black Cat Character Jar Kit from Target. I found it in the dollar section at Target, which I hate because I always get in trouble in those aisles. I cant resist the deals and cute stuff! I purchased the kit for $3. They also have a pumpkin, monster, mummy, and sugar skull jar kit too. Lil picked the cat one and I got the sugar skull for myself.


The instructions provided were very easy to follow. This is kit ended up being a two day project since we had to wait for the black paint to dry completely before adding the cat face stickers. Lil added the cat ears first (as the jar soaked in warm water to remove the label), then painted the jar, and stuck the cat face stickers the next day.


I must admit while helping Lil with her cat jar kit, I was getting a bit frustrated because she wouldn’t listen and was putting stickers wherever she wanted. It wasn’t turning out to look like the cat jar in the picture. For example, the cat’s ears weren’t positioned right. Obviously, I had to remind myself she’s just a toddler. Most importantly, I realized by letting her do her own thing it made her cat jar more unique. I absolutely love how one of the cat’s eyes is crocked; it gives the cat character. Doing crafts with Lil has taught me to be patient and forced me to move perfectionism gradually to the side.

Lil loves making crafts. I have been making art with Lil from the very beginning, with footprint art. I’ve always known that not only is being creative with my kid fun but it is also beneficial. I just didn’t know exactly in which way until I read “Why Art and Creativity Are Important” on Parents.com. I was thrilled to learn, Lil was improving her fine motor skills just by manipulating the paintbrush when painting her jar black. I also liked reading that by letting Lil do her own thing, putting the cat face stickers were she wanted on the jar, she was reaping big rewards. Creating art and learning new nursery rhyme songs helps boost Lil’s self-confidence. Every time her dad comes home from work, she can’t help but show off her new creation or sing the new song she learned. 

Currently, Lil’s cat jar kit sits on a table, in our small living room area, along with other Halloween decorations and Halloween picture frames. I gave Lil a LED tea light candle to put inside her cat jar since she didn’t over the jar completely with black paint. Her cat jar looks awesome at night, as the light shines through. She enjoyed making the Cat Character Jar Kit so much; she asked me if I could get her the monster jar kit and get her dad the pumpkin one at Target. The following week, I did. 

Hopefully, if time permits I can share the rest of the Halloween kits Lil and I have completed. 

October 1, 2013

Inspirational Halloween Ideas

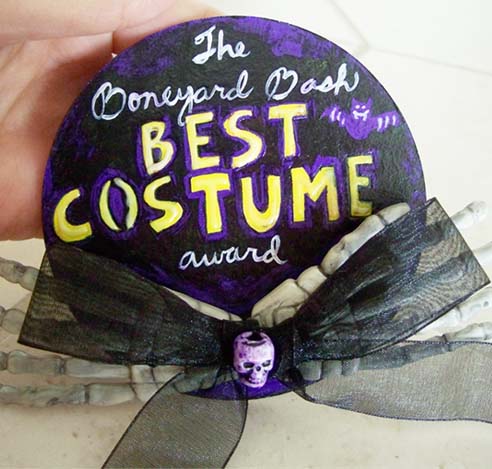
To help you get ready for Halloween I’m sharing 7 past blog posts. Many DIY posts, a costume idea, and past Halloween parties to help you plan your own. Your guests won’t forget your Halloween party with this DIY Skeleton Hand Invitations.

This Halloween DIY Bloodshot Eyeball Magnet decoration will sure stand out.
DIY Eyeball Tissue Paper adds a special pop to any Halloween package.

Can’t throw a party without Halloween Decorations.

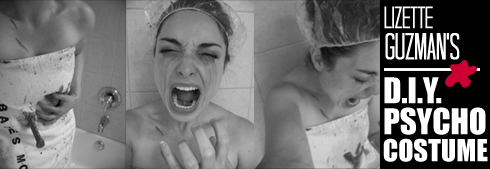
You will sure make a scene with this easy DIY Albert Hitchcock Psycho Costume.

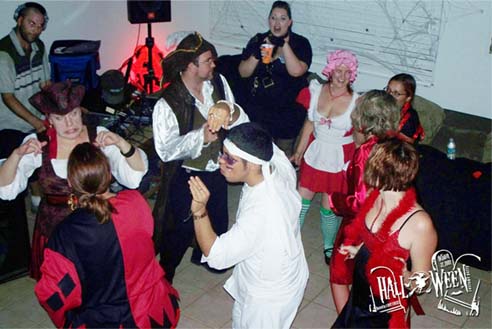
Thinking of a themed Halloween party? These past parties might help. Halloween House Party,


I hope these posts help you plan the best Halloween party ever!

August 29, 2013

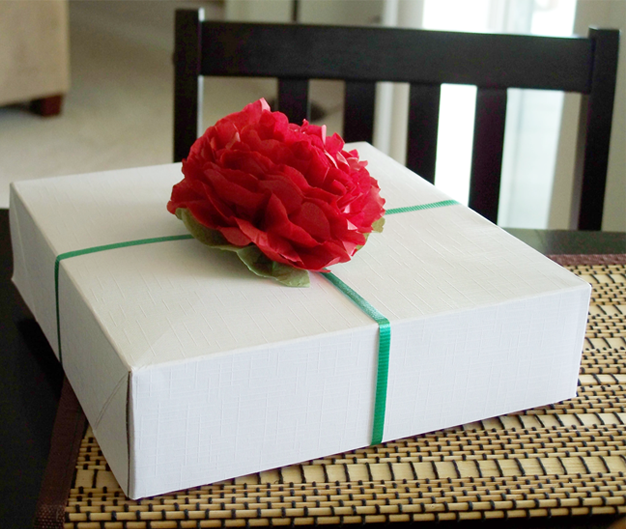
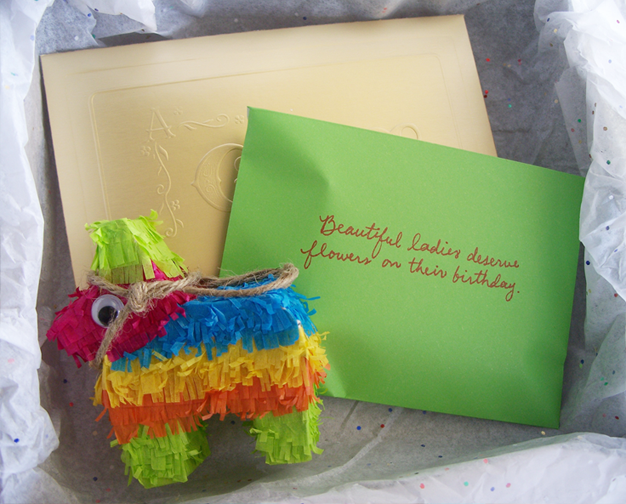
Beautiful Ladies Deserve Flowers on their Birthday

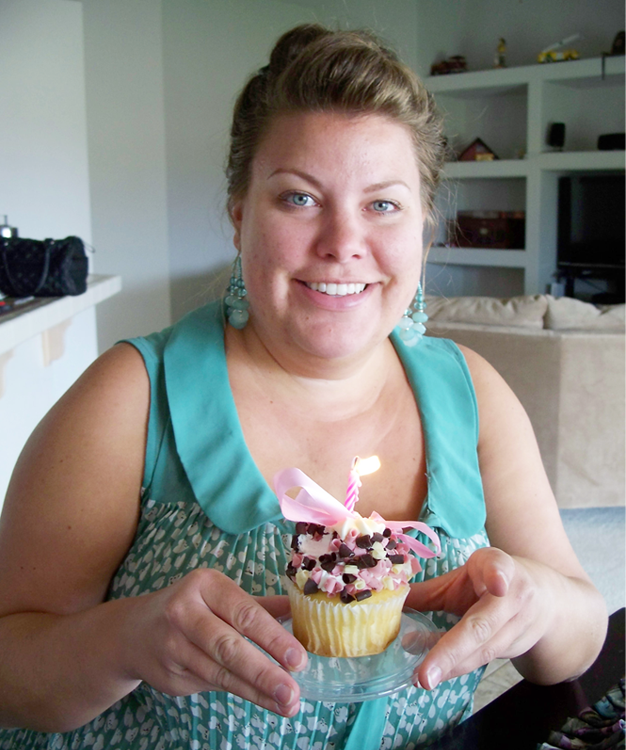
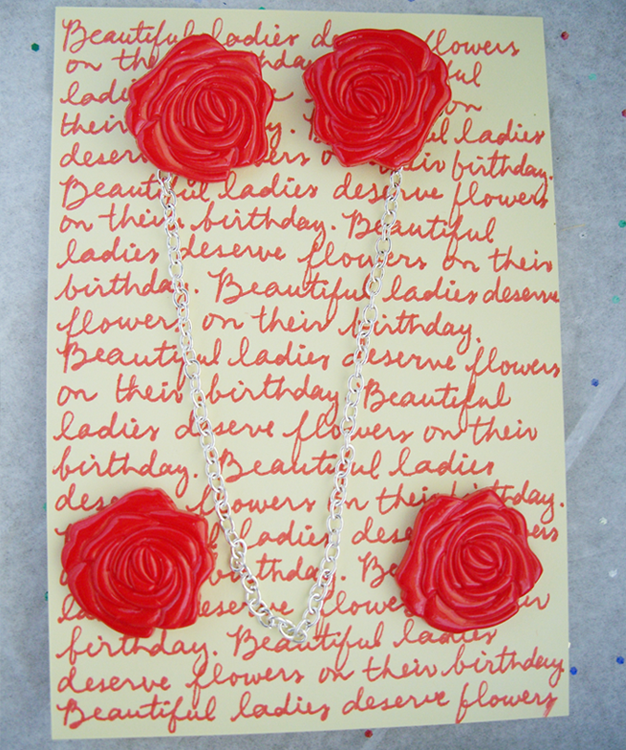
Amanda and I celebrated her birthday a day early. She came over to my place and we worked on making necklaces out of neckties as we watched movies on Netflix. I got Amanda a gift certificate to her favorite store, G stage, a homemade piñata ornament, and a pair of rose earrings with matching sweater clips, which I made. I also got her a birthday cupcake filled with strawberry filling. She made a wish and we shared it.
Amanda, I hope you had a wonderful birthday yesterday. I can’t wait until we go shopping together.

August 26, 2013

Got My Eye On Education


It has been fun seeing pictures of my friends’ children first day of school pictures on facebook. Beautiful children wearing their favorite back-to-school outfits, backpacks filled with schools supplies, and holding a sign saying, “first day of (insert grade).” Some with an eager or nervous smile as they embark into a new grade, make new friends, and fill their minds with knowledge.

I’ve also enjoyed reading the blogs of the ladies I follow as they write about how their baby cried, she cried, or how their baby walked with confidence into their class without looking back on their first day of preschool. It’s funny a mother will always be a child’s first teacher.

As I (God knows) patiently okay sometimes not so patiently wait for my turn to be a mother, I think of all the great things I’ll get to do and I can’t wait! I know I’ll be one of those mommies that balls my eyes out when my beautiful smart kid starts going to school and I’ll frame his/her artwork in our house like if it is displayed in a museum, and share some cheese and crackers with juice when he/she gets home from school to discuss what he/she learned today. I’m getting teary eyed now.

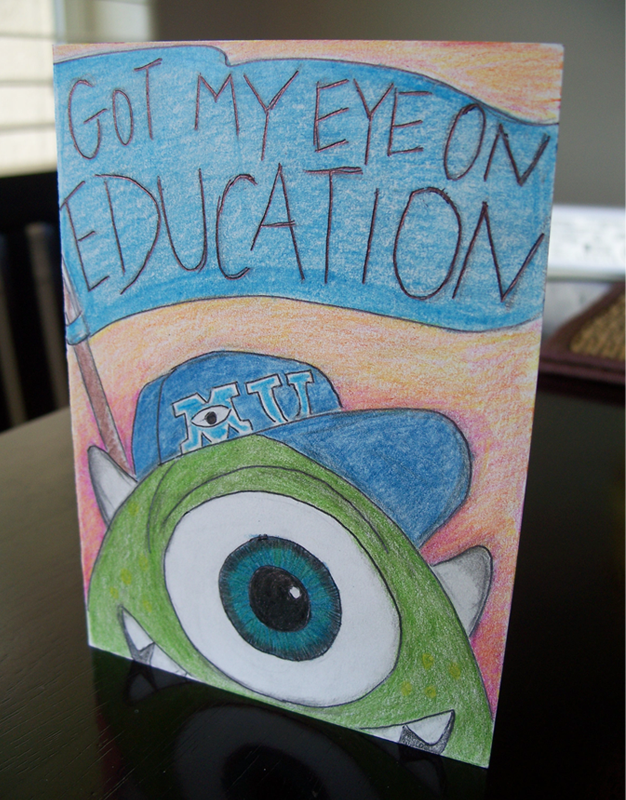
For now, I use my creativity to spoil my kids (employees) at work. When Kristal graduated with her bachelor’s degree I made her a card with a picture of Mike Wazowski in his Monsters University cap with a blue flag that says, “Got My Eye On Education.” I made my little monsters at work Monsters University I.D. pins, which they wore as our theatre played the Monsters University movie. I even changed the managers I.D.s to say faculty instead of students.

And all my bottled up motherly love goes to Belle.

July 16, 2013

From All of Us Card: Band-Aid Kit


The next member to leave the Cinemark theater family, where I work, is Hailey. Hailey will be a senior this coming school year and will start her internship at a convalescent home as well. As always, when an employee gives their two weeks notice I try to make a special good-bye card just for them.

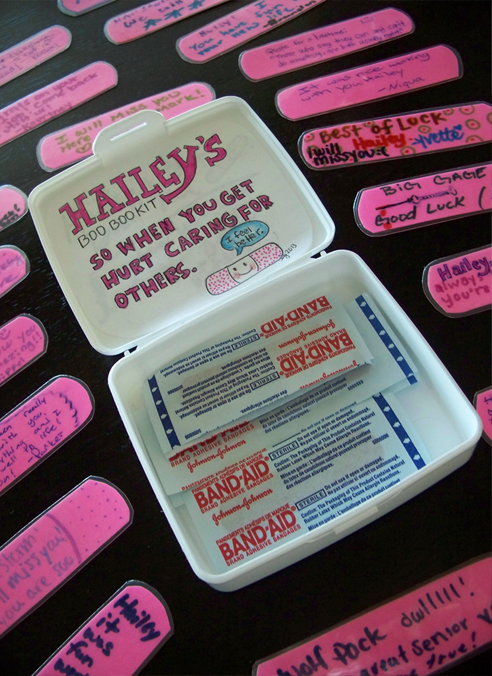
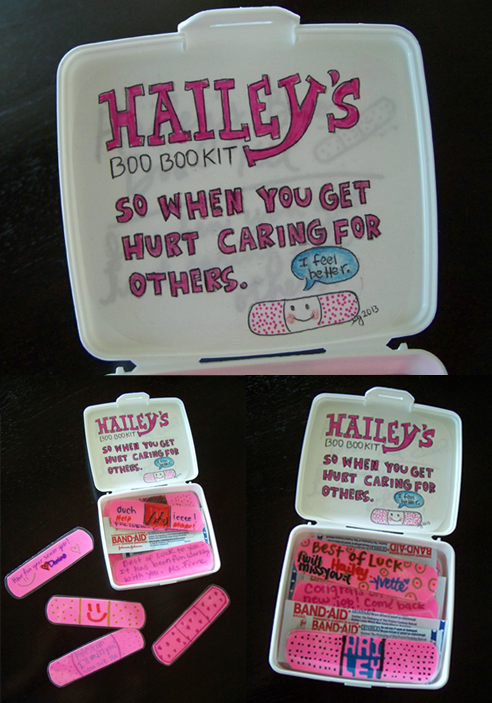
Since Hailey’s internship deals with caring for others I decided to make her a Band-Aid kit card. All the employees wrote special messages on pink paper cutout band-aids with colorful markers and some drew fun designs on the back of them. I got the band-aids laminated and put them into a Band-Aid kit I got at the 99 cent store, along with the real Band-Aids inside. On the inside of the lid box I wrote, “Hailey’s Boo Boo Kit. So when you get hurt caring for others” with a picture of a smiling band-aid saying, “I feel better” in a thought bubble, on sticker paper.

Hailey’s coworkers wrote encouraging and special messages on the pink paper band-aids. Only if real band-aids had messages like that, I think people boo boos would feel better soon.

This card is a great idea for an individual graduating from nursing school, a caregiver, a mother of a child who is accident-prone, or even a baby sitter.

June 11, 2013

Salad Card To Go

As some of you may already know, I work at a movie theater. I’ve been at my building for 4 years but with Cinemark Company for a total of 9. Just like any job you work at for a long period of time, people tend to come and go. My favorite reasons for employees having to leave is when they are trying to better themselves, either new job, going to college, having children… Oh wait, that’s the reason I hope to use someday. However, no matter their reason, I try to make he/she a special going away card that reflects their new journey or based on the things they like.

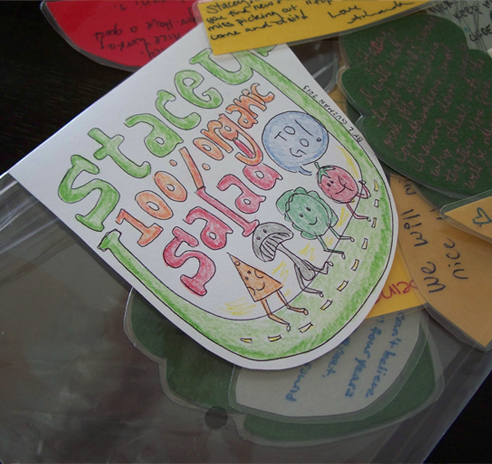
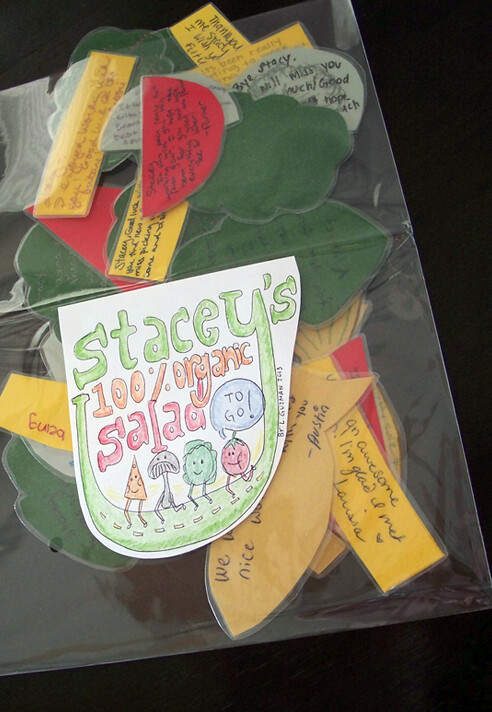
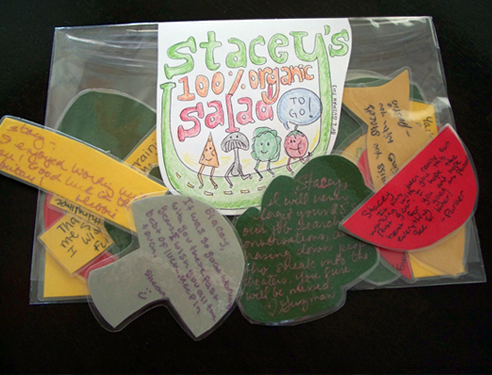
Currently, another bird flew the coup. Stacey had been employed at the theater since it opened. Stacey loves to eat healthy and 99% of the time brought a salad to eat at work. For a while, she even sold organic salads to the staff. Stacey knew my ritual of making special cards and she even told a manager she had a feeling she was going to get a salad card. And, that’s exactly what she received – Stacey’s 100% Organic Salad To Go card.

I cut out shredded cheese, cut tomatoes, slice mushrooms, lettuce, and even anchovies (one day the trashcan closest to the break room smelled like anchovies for a day) out of construction paper. I had the employees’ write their farewell wishes on them and got them laminated. I cut the laminated salad ingredients out and put them in a clear protective bag. Like the ones used when you purchase a fancy card. The salad label I created said, “Stacey’s 100% Organic Salad” and the tail of the letter y was used as a road for 4 salad pieces to run on, with the last runner saying, “To Go!” I drew the label on sticker paper.

Stacey really liked her card because salads are a part of who she is. 100% organic salads to be exact and that’s one of the qualities we will always remember her for.

June 4, 2013

The Big Wedding Embroidery Hoop

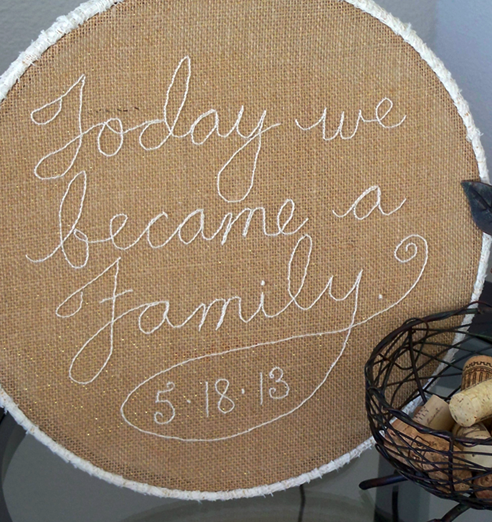
I made a 12 inch custom embroidery hoop as a wedding gift for my friends, Kevin and Becky. I told Becky I would embroider any saying she would like. Kevin has children from a previous marriage and Becky the wonderful step mom she is wanted her hoop to say, “Today we became a Family.” Her choice of words were perfect for what her wedding date would signify, not only to her and Kevin but the children too. Becky treats the kids like they’re her own.

Making this wedding gift brought me some challenges. One, I had never worked on a hoop this large. Secondly, embroidering on burlap was a new material I hadn’t embroidered on before. Lastly, I tried out a new stitch, stem stitch. I chose to use burlap and lace to reflect the theme of the wedding.

Unfortunately, I wasn’t able to complete the hoop by the wedding date. I wanted it to be displayed at the wedding reception but I didn’t master the stem stitch until I got to family. I seamed ripped the other words and re-stitched them. I knew this gift would be greatly cherished. I wanted it to look professionally made and stitched with love.

I gave Becky her custom hoop on Sunday and she loved it! It almost made her cry.

May 12, 2013

Mother’s Day Frame


Happy Mother’s Day to all you beautiful and wonderful mothers out there. I can’t wait to someday be among you and be called a Mama! Today, I’ll be spending some quality time with my mom and I can’t wait to see her reaction when she sees the gift I made for her.


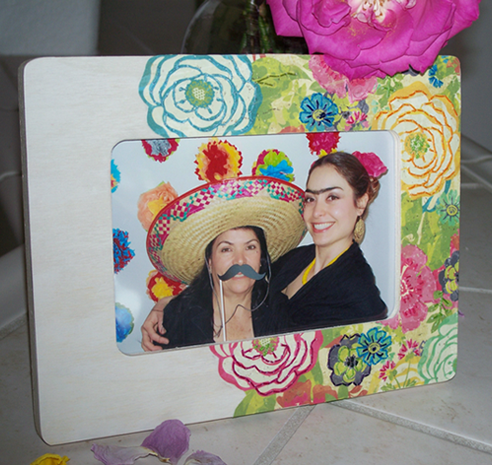
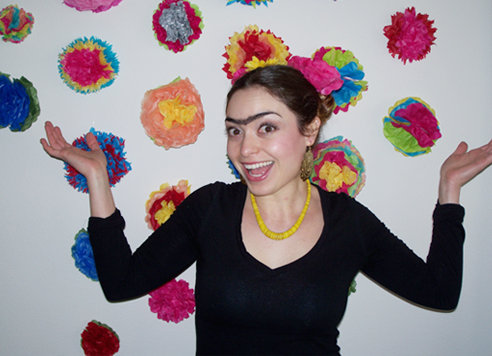
I embroidered flower print scrapbook paper and glued it to a frame. I inserted a great picture of us my friend Amanda took at my Frida themed birthday party. The scrapbook paper does a good job blending in with the tissue paper flowers on the background of the picture.

When I get a chance, I’ll be making myself a frame too. That way we’ll both have a matching set.

April 19, 2013

Fire Wife Necklace For Bride To Be


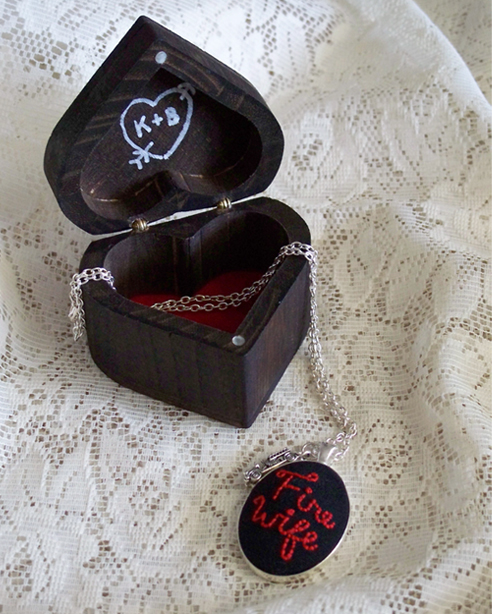
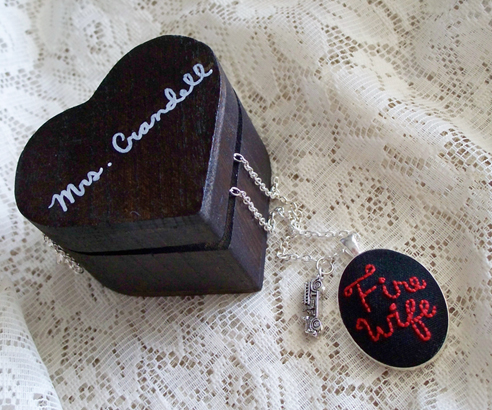
I went to a bridal shower last weekend and this is what I made for Becky, the bride to be. Becky is marrying a coworker of my firefighter named Kevin. Her gift included a heart trinket box, a fire wife necklace, and a gift card to Victoria’s Secret. I stained a wooden heart box and wrote on it with a white paint pen, inspired by a DIY tutorial. I embroidered Fire Wife onto a charm for a necklace and attached a fire truck charm to it.

Becky absolutely loved her gift. She can’t wait to wear it when she officially becomes the wife of a fireman. I can’t wait to make a Fire Wife necklace for myself too!

March 17, 2013

Completed Projects: Owl Wall Hook


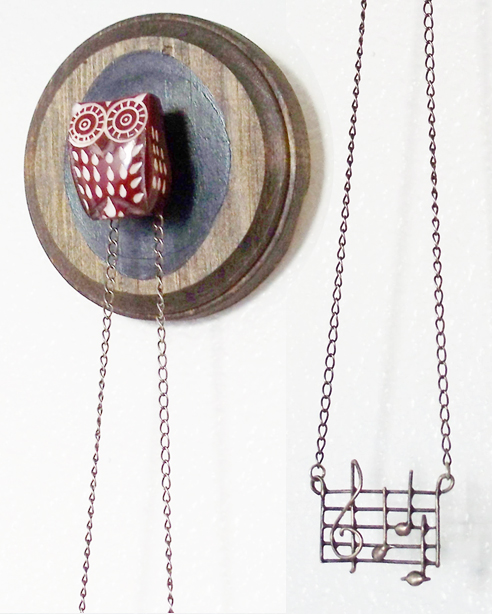
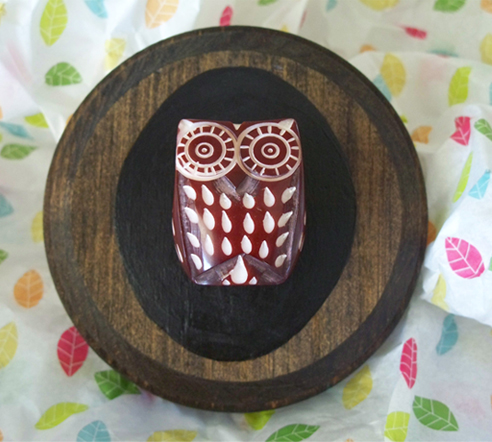
I have two friends, Ms. Thayer and her sister Tawnya, who are into the owl craze. Every time I see owl tutorials or objects I think of them and how I can make them something owl related for their birthdays. Last year when a Hobby Lobby opened near town, I found these cool carved owl knobs and I knew I could use them for an owl project for my owl friend fans.


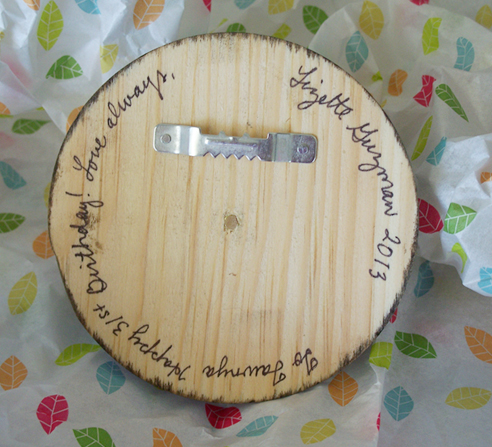
I came up with the idea to put the owl knob in a round piece of wood and make it look like it was perch in a tree. This idea was floating in my head for a long time. With Tawnya’s birthday this month I was finally able to bring the owl wall hook idea to life. My handy fireman and his new collection of tools helped me drill a hole in the wood for the knob to go in. We were both very happy with the outcome. I know Tawnya will love it. The again it is an owl.

I’ve never been a big owl fan but my friends and swap partners loving these nocturnal creatures and I’ve found myself making many owl themed projects and discovering that they’re pretty cool after all. Click here, here, here and here to see my other owl projects.

March 7, 2013

The Flowers in Frida’s Hair


Bee Creative Swaps’ first swap was titled, “Artist Swap” where we made an art piece inspired by the artist our partner chose. My swap partner was Emily, co-founder of Bee Creative Swaps and blog owner of The Morose Bee, and her artist of choice was Frida Kahlo! Lucky me right? As a bow for Emily’s swap package, I made a tissue paper flower inspired by the flowers in Frida’s hair. I loved the way it turned out and had to include tissue paper flowers in my “Celebrate Life Frida Style” birthday party.


With the help of my friends, Amanda and Christi, we were able to make 23 beautiful tissue paper flowers of different colors. Click here for the flower tutorial. Thank you Amanda and Christi! The majority of the flowers were made out of recycled tissue paper I had been saving from the holidays and birthdays. Let’s admit it, we crafters are slight hoarders.


I was fascinated by the outcome of the flowers and the making process that I ended up staying up very late one night making more to use as garland. However, these were solid color and fluffed all the way around. Click here for tutorial used.

On the morning of my fiesta (party), Amanda came by to help me hang my decorations. My papel picado banner made of plastic was purchased at Amols.com and hung on my front porch. My Catrina on my front door held my flower garland. Amanda also helped me hang the rest of the tissue paper flowers with clear packing tape on one of the walls in my house, you notice when you first walk in. This wall became the photo backdrop for my guests. From all the decorations at my party, the photo backdrop still remains up.

February 26, 2013

Put Your Big Girl Panties on, and Stop Whining!


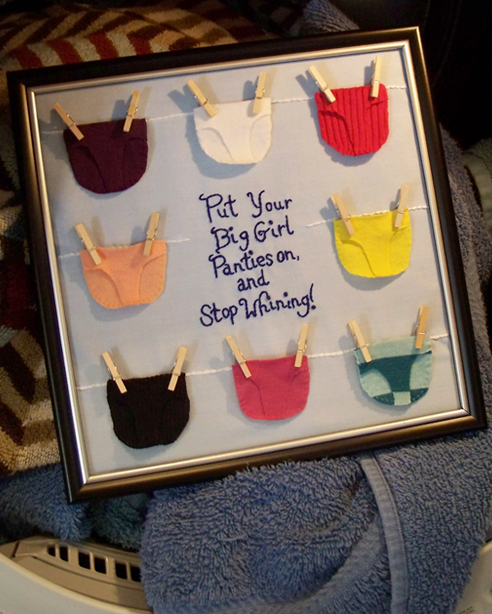
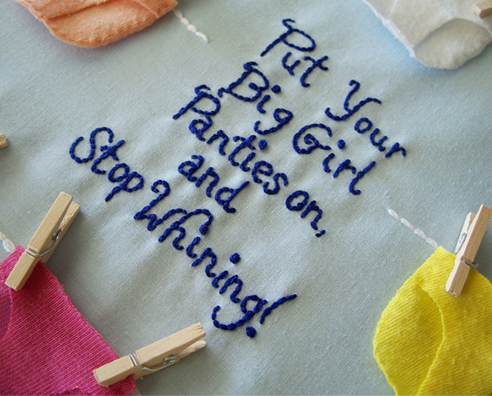
To stop whining and acting like a grown up lady was one of my Out With The Old and In With The New Swap partner’s New Year’s resolution. My swap partner name Nicole also wanted to go to the gym more and save money since she was recently engaged. From the three resolutions she gave me I had to choose one to make her something for this swap. The stop whining and acting like a grown up lady resolution seemed to be the most challenging and fun. After brainstorming many ideas, I came up with this funny encouraging frame to help remind Nicole to stop whining.


I took pictures of the process of making the frame. I hand sewed eight mini panties out of old t-shirts, all different colors and fabric. I embroidered my favorite part of the frame, the saying – “Put Your Big Girl Panties on, and Stop Whining!” I positioned the mini underwears were I wanted them and marked were I planned to embroider the clothesline. I embroidered the clothesline with white embroidery thread and glued the clothespins holding the underwear with a hot glue gun.

For this swap project we had to incorporate at least two unwanted craft supplies from our own personal materials. I already owned the old t-shirts used for the mini panties, I had the blue fabric from my thrift shopping trips, and I also owned all the embroidery thread used. The only items I purchased were the clothespins and the frame. The main idea of “Out With The Old and In With The New Swap" was for us to use our old items and make something new out of them for someone else.


“LOVE IT SOO CUTE,” was Nicole’s reaction when she received her frame. I’m thrilled she loved it and like all my babies, my handmade creations, it was hard to see it go. I still have supplies left over from this swap project and plan to make one soon and sell it on my Etsy shop. No need to get your panties in a twist. You can own a Stop Whining frame like Nicole too.

Check out the other awesome Out With the Old and In With The New Swap creations at Bee Creative Swaps on Facebook.

February 25, 2013

DIY Mini Piñata Candy Jar


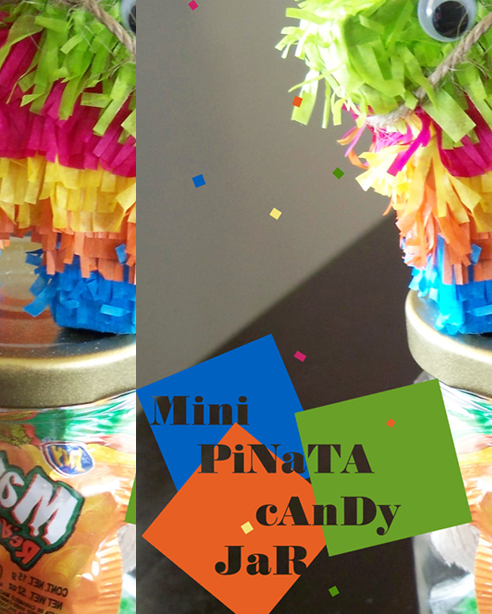
The weather was going to be cold outside; it wasn’t a kid’s party though others can say otherwise, and I wanted Mexican candy for my “Celebrate Life Frida Kahlo style” birthday party and making mini piñata candy jars instead of purchasing a big piñata was the perfect solution.

Save a piñata and make a candy jar. The piñata will be glad, for other reasons, and so will you!

Supplies: Empty sauce jars, green scrubber sponge, spray paint, cardstock/cereal box, masking tape, craft glue, paintbrush, scissors, pencil, assortment of colorful tissue paper, glue gun, and candy of your choice.


Dale 1 (Dale means hit in English. Dale comes from the Mexican song the crowd sings while someone is hitting the piñata): Wash the sauce jars out and use a green scrubber sponge to remove the sticking glue left on the jar from the jar label.

Dale 2: Spray paint the lids. My firefighter spray-painted mine. I’m a bad spray painter.

Dale 3: Make your mini piñatas. I can’t take credit for this step. I used CampFire Chic blog and Oh Happy Day blog to help me make the mini piñatas. Make your piñatas your own. I added googly eyes and a hemp saddle to my donkeys.


Dale 4: Glue mini piñata onto jar lid with your hot glue gun.

Dale 5: Put candy in jars. You know you’ll have a candy while stuffing the jars. I did.

Mini piñata candy jars also make great centerpieces and the perfect party in a jar to give as a birthday gift with the recipient's favorite candy.

February 2, 2013

Day 12: Ugly Christmas Sweater


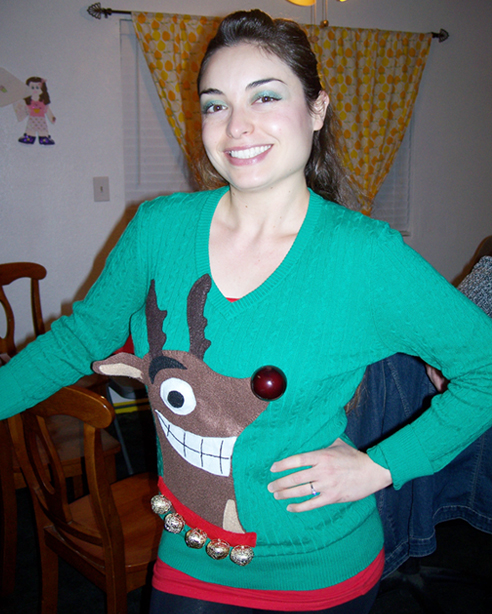
Today, I end my twelfth day of Creative Christmas with an item I made for myself. My firefighter tends to wait for the last minute for things, so it’s no wonder that he waited the weekend before his ugly work Christmas sweater party to search for sweaters. We hit all the local thrift stores and nada (nothing). The next best thing was to make our own ugly Christmas sweaters. I was going to borrow a friend’s homemade ugly Christmas sweater but my firefighter looked so animated about making his own sweater, as we purchased his supplies at Michael’s, that I decided to make one too. I didn’t want to miss out on the creative fun.

It took me about seven hours to make my ugly Christmas sweater, of a perverted reindeer with a light up nose. During those seven hours I didn’t eat. Truly, I think they call artists starving artists because they are in a creative zone and don’t want to stop until their piece is complete. That’s what happened to me.

My reindeer was made out of felt and it was all hand sewn. The teeth are embroidered and I used big jingle bells for the reindeer’s collar. I originally wanted to add battery operated Christmas lights around the reindeer’s antlers but I ran out of time. The reindeer’s nose was a costume light up reindeer nose. I made a hole in the sweater and used a glue gun to keep the nose in place were my left breast is located. The reindeer’s smile, the slightly popping out eye, and were the nose is located makes it a perverted ugly Christmas sweater. What I like about my sweater is it is not obliviously perverted. Our friends’ kids thought it was cool how it jingled and lit up.

Below are links to my other eleven Creative Christmas homemade gifts, just in case you missed some. 

Twelve Days of Creative Christmas: Day 1

Twelve Days of Creative Christmas: Day 2 

Twelve Days of Creative Christmas: Day 3 

Twelve Days of Creative Christmas: Day 4 

See You Next Year / Day 5 of Creative Christmas 

Day 6 of Creative Christmas: Married Christmas 

Day 7 of Creative Christmas: A Thrifted Gift 

Day 8 of Creative Christmas: Little Monster Scrapbook 

Day 9 of Creative Christmas: Embroidered Oven Mitt

Day 10 of Creative Christmas: From Belle 

Day 11: DIY Engraved Tree Style Frame 

Thanks for joining me in my creative shopping making spree for family and friends for Christmas 2012.

January 22, 2013

Etsy Shop Update


I’m excited to share my new item on my Etsy shop. Custom tree trunk heart rings! My first sample ring has my firefighter initials and mine. Perfect for Valentine’s Day right?

January 21, 2013

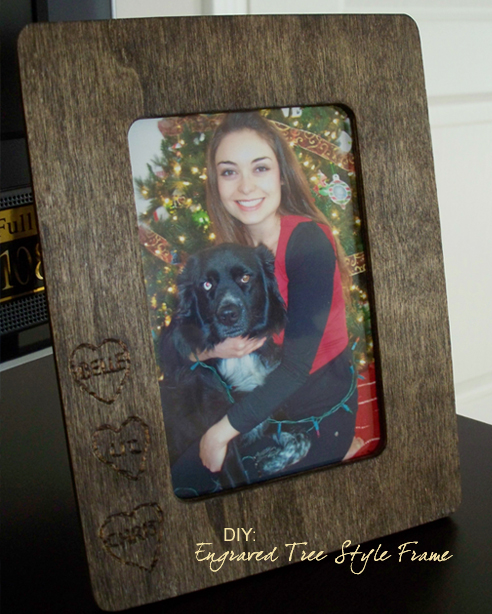
Day 11: DIY Engraved Tree Style Frame


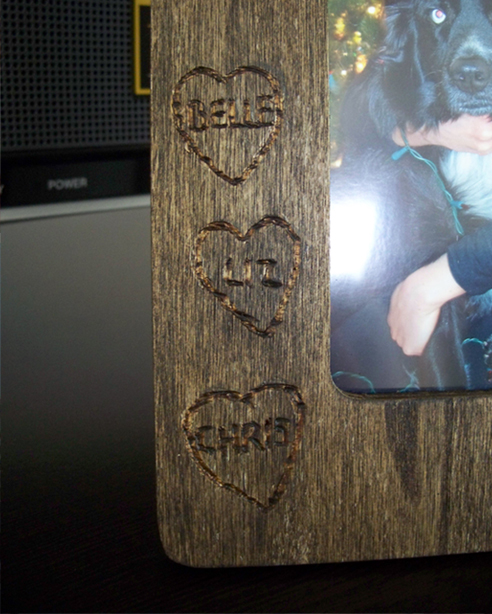
My firefighter told me not to buy him anything for Christmas. So, I didn’t. Instead, Belle and I made him a tree style frame with hearts engraved in it. I made the frame look like a tree that had been craved with hearts, like lovers do on a tree. I carved three hearts onto the frame. They read Belle, Liz, and Chris.

In the frame, I inserted a picture of Belle and I in front of our Christmas tree that my dear friend Amanda took of us. My firefighter loves the frame and he plans to take it to work and hang it in his locker. Then, he can see his two favorite girls when he is away at work.

Here’s what I did:


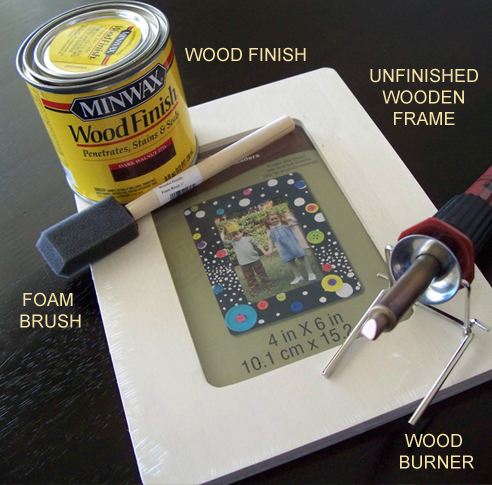
Supplies Used: unfinished wooden frame (got mine at Michael’s), wood engraver, paint brush/foam brush, color of your choice wood finish, and a pencil.

Step 1: Brush your frame with the wood finish. The more layers you add the darker the frame will get. Let frame dry for one to two days.

Step 2: With your pencil, draw were you would like your hearts to go.


Step 3: Heat up your wood engraving tool. Using the universal point, trace your pencil markings over and over until it looks like the frame had been craved into.

Step 4: Insert a picture in the frame. If your frame doesn’t come with glass to protect your picture you can purchase some transparency sheets from Staples and cut it to size to protect your picture.


Belle and I hope you enjoy this tutorial. It will make a great Valentine’s Day gift for anyone special in your life, even the furry kind.
Related Posts Plugin for WordPress, Blogger...