Showing posts with label Christmas. Show all posts

February 2, 2013

Day 12: Ugly Christmas Sweater


Today, I end my twelfth day of Creative Christmas with an item I made for myself. My firefighter tends to wait for the last minute for things, so it’s no wonder that he waited the weekend before his ugly work Christmas sweater party to search for sweaters. We hit all the local thrift stores and nada (nothing). The next best thing was to make our own ugly Christmas sweaters. I was going to borrow a friend’s homemade ugly Christmas sweater but my firefighter looked so animated about making his own sweater, as we purchased his supplies at Michael’s, that I decided to make one too. I didn’t want to miss out on the creative fun.

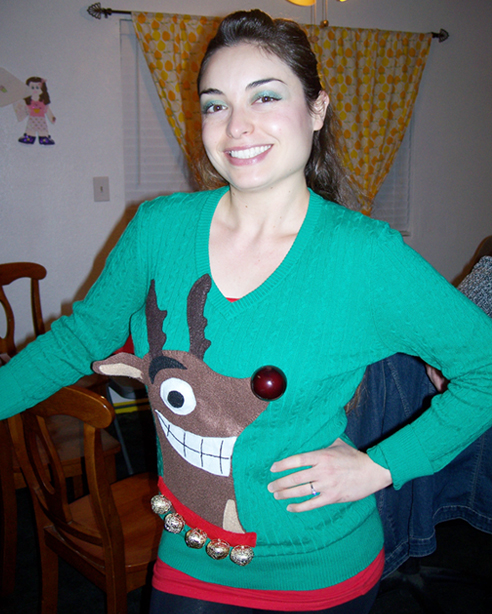
It took me about seven hours to make my ugly Christmas sweater, of a perverted reindeer with a light up nose. During those seven hours I didn’t eat. Truly, I think they call artists starving artists because they are in a creative zone and don’t want to stop until their piece is complete. That’s what happened to me.

My reindeer was made out of felt and it was all hand sewn. The teeth are embroidered and I used big jingle bells for the reindeer’s collar. I originally wanted to add battery operated Christmas lights around the reindeer’s antlers but I ran out of time. The reindeer’s nose was a costume light up reindeer nose. I made a hole in the sweater and used a glue gun to keep the nose in place were my left breast is located. The reindeer’s smile, the slightly popping out eye, and were the nose is located makes it a perverted ugly Christmas sweater. What I like about my sweater is it is not obliviously perverted. Our friends’ kids thought it was cool how it jingled and lit up.

Below are links to my other eleven Creative Christmas homemade gifts, just in case you missed some. 

Twelve Days of Creative Christmas: Day 1

Twelve Days of Creative Christmas: Day 2 

Twelve Days of Creative Christmas: Day 3 

Twelve Days of Creative Christmas: Day 4 

See You Next Year / Day 5 of Creative Christmas 

Day 6 of Creative Christmas: Married Christmas 

Day 7 of Creative Christmas: A Thrifted Gift 

Day 8 of Creative Christmas: Little Monster Scrapbook 

Day 9 of Creative Christmas: Embroidered Oven Mitt

Day 10 of Creative Christmas: From Belle 

Day 11: DIY Engraved Tree Style Frame 

Thanks for joining me in my creative shopping making spree for family and friends for Christmas 2012.

January 21, 2013

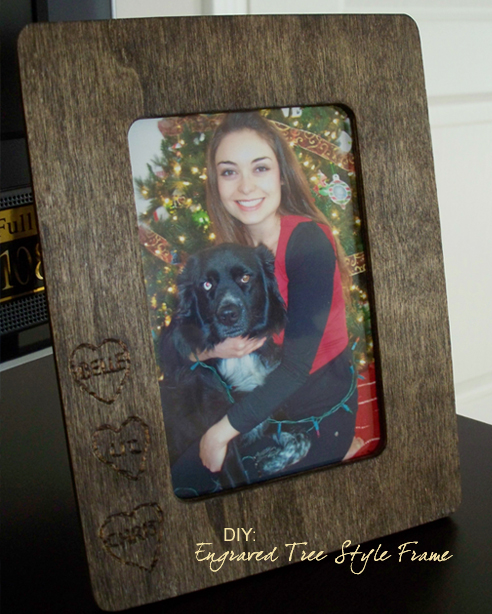
Day 11: DIY Engraved Tree Style Frame


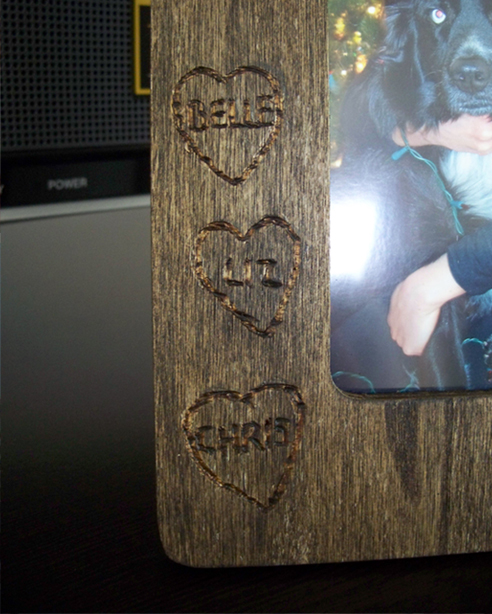
My firefighter told me not to buy him anything for Christmas. So, I didn’t. Instead, Belle and I made him a tree style frame with hearts engraved in it. I made the frame look like a tree that had been craved with hearts, like lovers do on a tree. I carved three hearts onto the frame. They read Belle, Liz, and Chris.

In the frame, I inserted a picture of Belle and I in front of our Christmas tree that my dear friend Amanda took of us. My firefighter loves the frame and he plans to take it to work and hang it in his locker. Then, he can see his two favorite girls when he is away at work.

Here’s what I did:


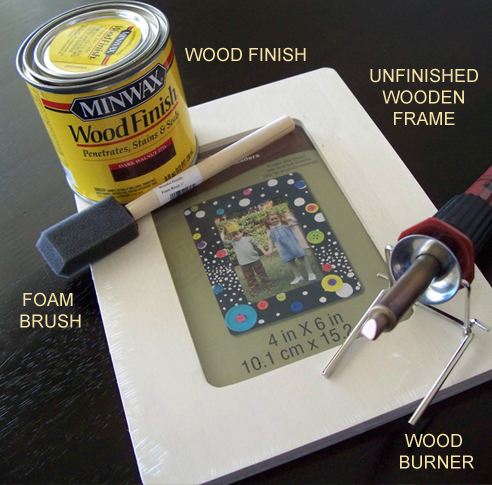
Supplies Used: unfinished wooden frame (got mine at Michael’s), wood engraver, paint brush/foam brush, color of your choice wood finish, and a pencil.

Step 1: Brush your frame with the wood finish. The more layers you add the darker the frame will get. Let frame dry for one to two days.

Step 2: With your pencil, draw were you would like your hearts to go.


Step 3: Heat up your wood engraving tool. Using the universal point, trace your pencil markings over and over until it looks like the frame had been craved into.

Step 4: Insert a picture in the frame. If your frame doesn’t come with glass to protect your picture you can purchase some transparency sheets from Staples and cut it to size to protect your picture.


Belle and I hope you enjoy this tutorial. It will make a great Valentine’s Day gift for anyone special in your life, even the furry kind.

January 13, 2013

Day 10 of Creative Christmas: From Belle


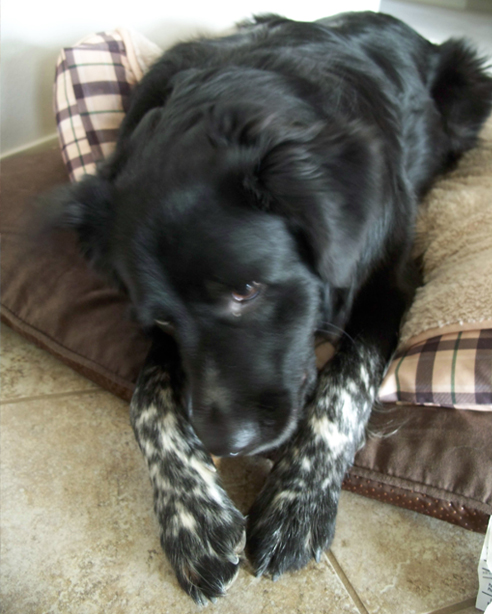
Belle here! I’m the beautiful furry beast that resides in this house.

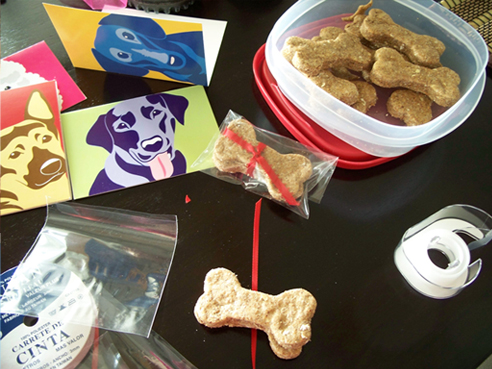
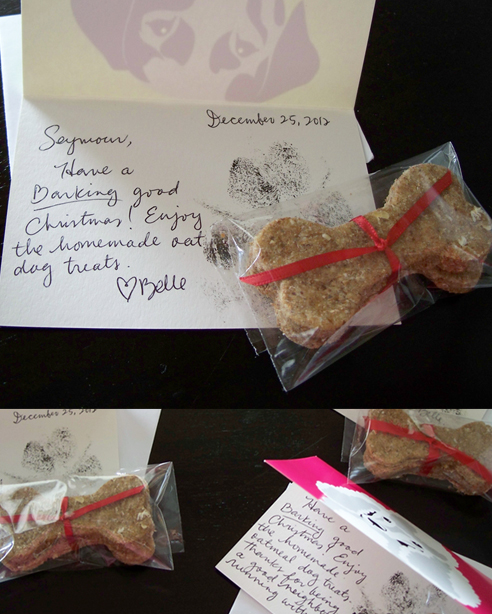
On Christmas day, my crazy lovable mom decided I should give out gifts to my dog friends and family. That’s mom for you. I only agreed because I got to sample the oatmeal dog treats again while she put everything together. Sorry about the burry picture. I don’t know why mom insists in taking pictures of me while I’m eating. I’m too busy enjoying my treat to concentrate on looking cute and adorable.


Mom made the oatmeal treats from a dog treat kit grandma gave me. She made extra treats than the box stated and unfortunately was told I was going to have to share with my friends. I did get to sample those fresh out of the oven though and Dad sunk some out of the container for me. Don’t tell Mom.


Mom can never make things simple. She took out the left over cards from my dog birthday party to use as dog Christmas cards. With my help, she wrote a little Christmas message in the cards. I came up with “Have a Barking good Christmas.” Yes, I’m clever and beautiful. Dogs don’t have a Merry Christmas, there’s always some type of barking involved. Each card was signed with my paw signature. I tell you; those dogs of mine are lucky to be my friends. Okay, and vise versa.

Mom wants to make dog treats for Valentine’s Day too. “Deal” I said! I’ll do anything for a treat.

Gotta go, Mommy has a treat for me! Hopefully, you’ll hear from me again soon.

January 11, 2013

Day 9 of Creative Christmas: Embroidered Oven Mitt


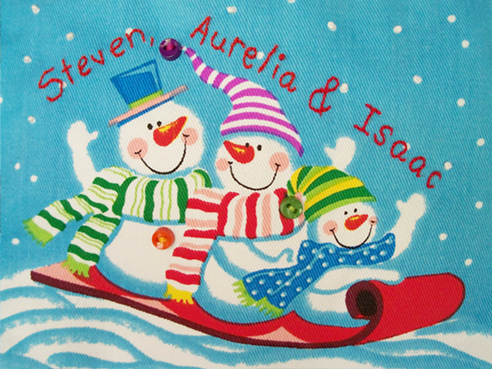
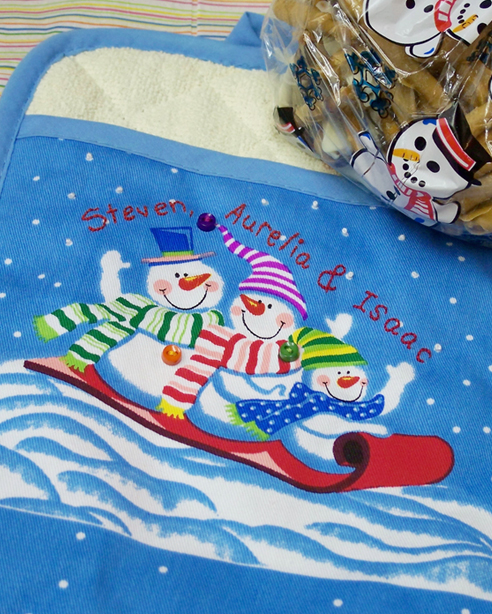
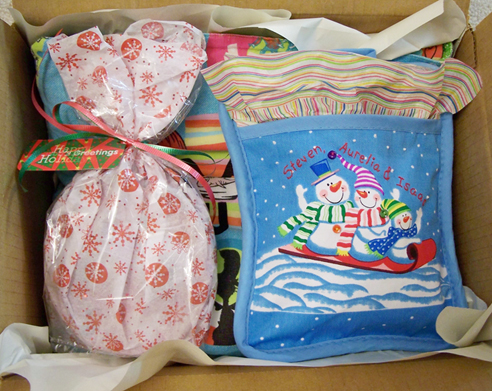
This oven mitt with a picture of three snowmen sledding together went to my sister Aurelia and her husband Steven for Christmas. I embroidered the names of my sister’s family, Steven, Aurelia, & Isaac, above the heads of each snowman, made French knots over some of the falling snow, and sewed miniature buttons on each snowman.


I had this oven mitt left over from a year when I made cookies and gave them to some clients of mine; I was doing freelance work for. I original wanted to make my sister and her husband a family monster ornament to match Isaac’s little monster scrapbook but I ran out of time, especially since I had to mail their package to Spain, where my brother-in-law is stationed. When I found the snowmen oven mitt with daddy, mommy, and baby snowmen on it I knew exactly what I wanted to do with it. Though not much work was involved embroidery it, I love how it turned out.


I added some of my homemade pretzels dipped in chocolate in the pocket of the oven mitt for them to enjoy. The oven mitt was the last item I needed before shipping my sister’s package to Spain. Everything in their Christmas package was homemade, the personalized Dr. Seuss blanket, the little monster scrapbook, and the embroidered oven mitt. I haven’t spoken to my sister yet but I have a good feeling they loved their gifts. She is a crafter like me by the way.

January 8, 2013

Day 8 of Creative Christmas: Little Monster Scrapbook


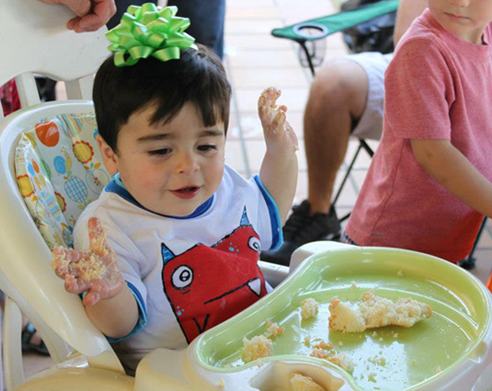
I would have loved to be at my nephew Isaac’s first birthday party, in Spain. But I felt like I was there. My sister was very good about posting many photographs of Isaac’s Monster Bash themed birthday party on facebook, making family feel like they were a part of his special celebration. Though we couldn’t attend, our heart was there.


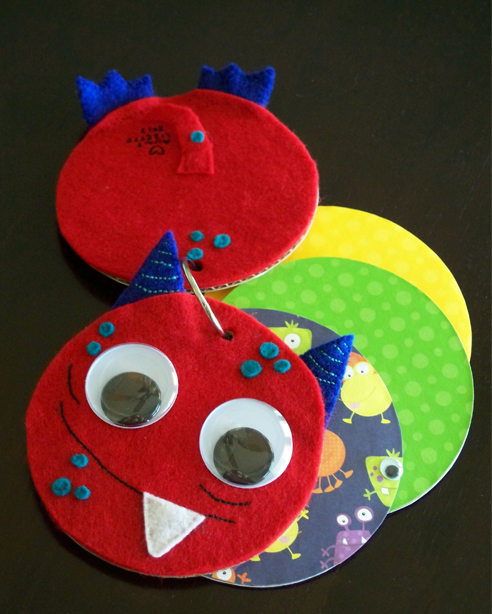
As I enjoyed seeing the pictures of Isaac’s Monster Bash, I was inspired by the little red monster on Isaac’s t-shirt, and wanted to make him something with the little monster incorporated in it. A monster frame, a stuffed monster...a little monster scrapbook! Perfect! Aurelia, my sister, could put all of her favorite photos of Isaac’s party in it.

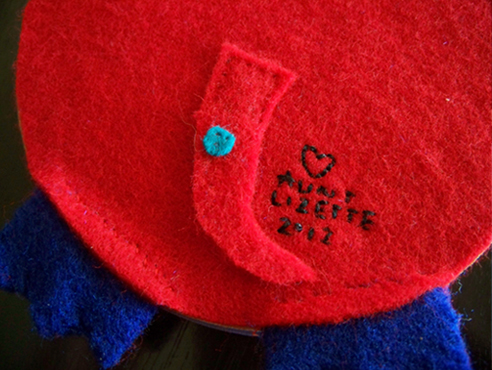
I used different color poke a dot paper and monster themed paper for the inside of the book. My favorite part of the scrapbook is making the front of it look exactly like the little monster on Isaac’s birthday t-shirt and the googly eyes. Googly eyes make things more googly fun. I added blue feet and a little tail to the back of the book with a butt embroidered message - Love Auntie Lizette 2012. He’ll always remember Auntie Lizette made it for him.


Isaac received his little monster scrapbook for Christmas. Maybe this will be my Christmas tradition for Isaac, receiving a scrapbook inspired by that year’s themed birthday party. Good idea? What do you think?

January 7, 2013

Day 7 of Creative Christmas: A Thrifted Gift


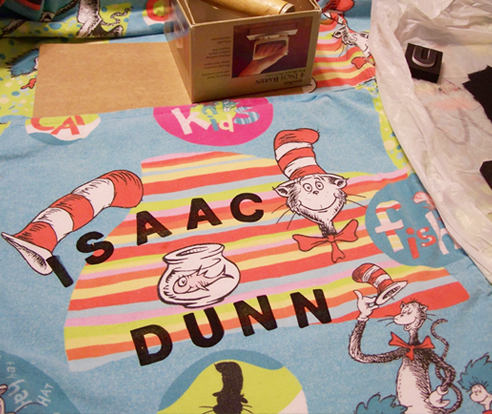
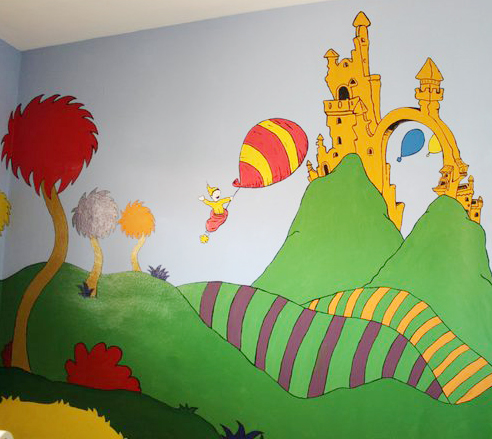
I personalized this thrifted Dr. Seuss blanket for my nephew Isaac, who lives in Spain, for Christmas with alphabetical stamps and oil base paint. Isaac’s room is covered wall to wall with De. Seuss inspired characters and scenery. My little sister Aurelia, with the help of her husband, painted the room. Being artistic runs in the family.

I had originally wanted to make Isaac a blanket when he was first born, September 2011, but one day while thrifting I came upon a homemade Dr. Seuss blanket and I knew it was perfect for Isaac. My sister and I are not picking when it come to used items. As kids, my parents took my sister, my brother Chuy, and I to thrift stores, garage sells, and swap meets. We are no strangers to used treasures. As adults, we enjoy going to these places with our spouses and children, or alone like I usually do. I love the opportunities when I get to see my siblings and go thrifting together. It brings back so many fond memories.


I didn’t send Isaac the Dr. Seuss blanket in 2011 because it was too big for a newborn and I hadn’t gotten a chance to sew together the stitches that were coming apart. My goal of making at least twelve homemade gifts for family and friends encouraged me to finally stitch up the blanket, personalize it, and send it to Isaac for Christmas. The blanket could be use for picnics, as a rug to play on, cuddle time with mommy and daddy, and in the future would cover his twin size bed. It also matches his awesome Dr. Seuss themed room perfectly!

January 2, 2013

Day 6 of Creative Christmas: Married Christmas


Last year was a very special year from my little brother Chuy. He became a married man! I still remember how surprised I was when he called me to let me know he had gotten married. I didn’t even know he was dating someone. He said he married his best friend and as long as he was happy, I was happy for him too. I told him I couldn’t wait to meet my new sister-in-law.


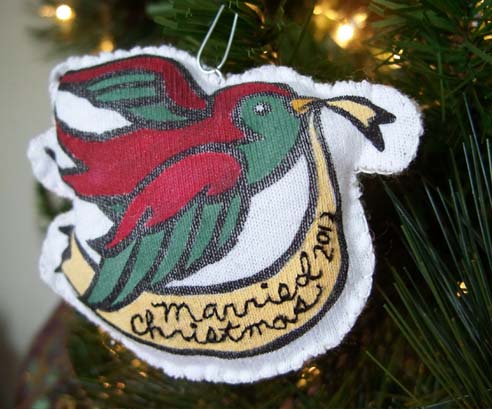
For Christmas, I made pretzels dipped in chocolate like I do every year for my brother for Christmas and his birthday. Its become my tradition for him because I now how much he loves them. I hope he realizes he's going to have to share them now. To commemorate their first married Christmas together, I used my popular sparrow stamp to make them a special ornament with “Married Christmas 2012” embroidered on the sparrow’s ribbon. Unfortunately, like my parents, he too received his Christmas gift late. During our Christmas day conversation I told him I made him an ornament to hang on his tree and he promised to keep his tree up a little longer to display it. I’m happy they have a first Christmas together ornament that I created!

December 31, 2012

See You Next Year / Day 5 of Creative Christmas

People keep saying, “See you next year!” and it sounds unreal and weird to me. When they say it I literally feel like their saying I won’t see them for a whole year, even though I know what they really mean.

I have so much more to do before this year is over. Too late now! Tomorrow is a new year and here I am still trying to share my Twelve Days of Creative Christmas gifts I made for family and friends and trying to write a cover letter for a possible job in hopes of a career change for the new year, a goal I had hoped to had achieved this year. Like prepaid cell phone minutes rolling over when unused, many of my 2012 goals will be rolling over to 2013. However, instead of having yearly goals I’ll be taking baby steps and spreading them throughout the year, one goal or more a month.

For now, here’s another creative Christmas gift I made. Enjoy, and I’ll see you next year!

One of my favorite handmade gifts went to my dad and mom (step mom). It was a cross stitch of two bears having a picnic with the word, “I LOVE YOU BEARY MUCH” around them. I found the cross stitch kit on eBay, where I tend to find many of my vintage kits. I actually finished the kit in November and I just needed to cover the back of the hoop with felt, with an embroidered message. With my crazy holiday work schedule I couldn’t mail my parents gift on time. Try working at a place, a movie theatre, which opens every single day. I went into work before the post office opened and got off after it closed. I felt awful when I called them the Saturday before Christmas to let them know I had received their gift and theirs wouldn’t arrive on time for Christmas. They’re my parents and naturally were very understanding. They’ll receive their gifts today! Hopefully, it was worth the wait.

December 30, 2012

Twelve Days of Creative Christmas: Day 4

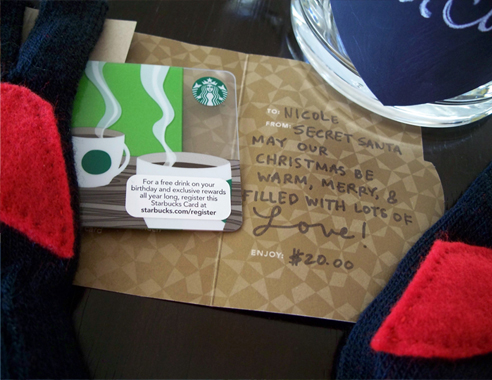
For my Secret Santa at work I made the person I got, Nicole, a homemade gift that conveyed warmth and love. Gloves and Starbucks were some of the items she wrote down on her Dear Santa list. I made Nicole a heart chalkboard mug, heart gloves, and I got her a Starbucks gift card.

My firefighter helped me spray paint the chalkboard mug with chalk paint. I’m not very good at spray painting items. I tend to get drip marks on items I spray paint. I’ve made this type of chalkboard mug before and the recipient loved it. I have seen online the half hearts on gloves that when cupped together create a whole heart and I had to make a pair for for Nicole. Sewing half the hearts on the gloves was tricky. I keep sewing the gloves together.


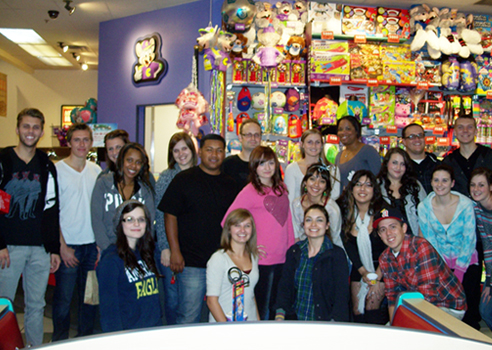
I put the gift card and gloves in the chalkboard mug and wrote her name on the mug with chalk. Nicole got to her Secret Santa gift at our Christmas party at Chuck E. Cheese. She said she like her gift. She didn’t even get a chance to ask who her Secret Santa was. A co-worker watching her open her gift happily told her, “Mrs. Guzman made those (the gloves).” Every year my employees hope I get them for Secret Santa because they know I’ll make something just for them.

Like thinking ahead, this homemade gift would make a perfect Valentine’s Day gift.

December 16, 2012

Twelve Days of Creative Christmas: Day 3

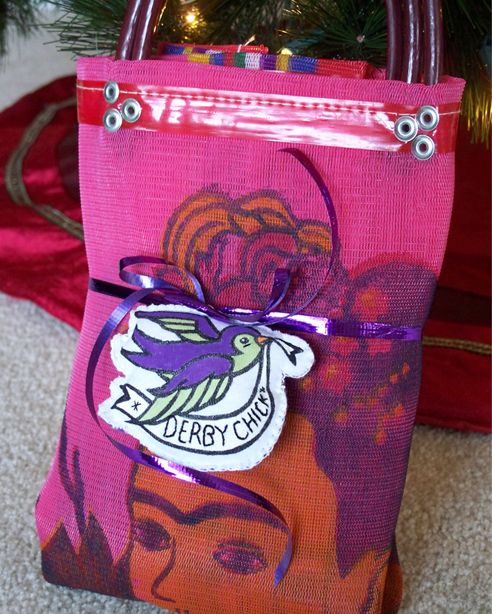
My third homemade gift goes to my swap partner in crime, Emily. Emily and I are the brains behind the wonderful swaps we have bought you this year and the creators of Bee Creative Swaps on facebook. I have never met Emily in person, but she has become a great friend through these swaps we have put on. I discovered Emily’s blog, The Morose Bee, though another blogger, who had won a prize through Emily’s Movie Monday. I soon discovered that Emily and I have lots in common, our love for Frida Kahlo, arts and crafts, and working with children.


I made Emily one of my popular sparrow ornaments. Each sparrow ornament is different to correspond to the person it is created for. In this case, the sparrow’s ribbon reads, “Derby Chick” because Emily is a part of the Boston Derby Dames. This sparrow ornament kicks butt with its little black line under its eye! With Emily’s ornament I had to include a Frida mesh bag. I purchased a few bags for my “Celebrate Life Frida Style” for my 31st birthday party that I will be throwing for myself in February, so of course I had to get one for Emily too. Emily received her package a few days ago and she said it made her day!

Have you received any holiday mail that has made your day recently?

December 13, 2012

Twelve Days of Creative Christmas: Day 2
 

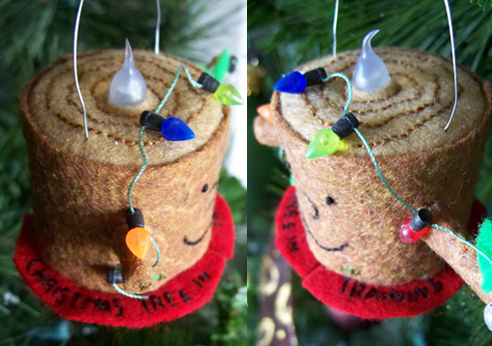
My second homemade gift goes to Diane, my other Ornament Swap partner. Diane loves nature and all sorts of trees. After sketching ideas on sticky notes and napkins, and googling nature themed ornaments I came up with the idea of making a little tree stump dressed up as a Christmas tree. Hence, “Christmas Tree in Training” embroidered around the stump’s skirt. For its shining star, I put a plastic tea light sticking out of the stump’s head. I added scrapbooking Christmas light on it and also embroidered a smiling face on the stump. Isn’t he the cutest thing ever? He was chilling on my Christmas tree for a few days before I shipped him out to Diane’s. I miss him so that I’m going to have to make one for myself.


This is what Diane said when she received her “Christmas Tree in Training” ornament, “I got it today! Thank you! It was the end of a very long week, so it was a great surprise! Thanks for the Christmas tissue too! The ornament is just darling and on my tree now! Love it! Merry Christmas!”

I’m glad her “Christmas Tree in Training” ornament lit up her day and her Christmas tree a little more.

Oh, and Hallmark if by chance you happen to fall upon my blog and like what you see, hire me! I would love to create an ornament for you!

To see more ornaments from the Ornament Swap check out Emily and my facebook page, officially called Bee Creative Swaps!
December 8, 2012

New Ornaments from Ornament Swap


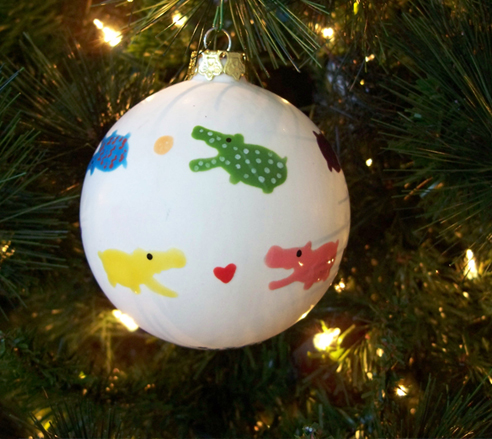
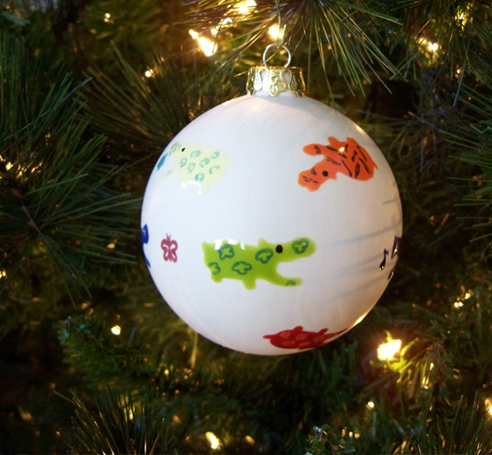
This week I received two new handmade ornaments from both of my partners from the Ornament Swap Emily and I put together. I received a bulb ornaments with different colored hippos painted around it and in between some of them have a flower, a camera, a music note, a heart, and a ball. One hippo even looks like a tiger. I told Diane my favorite animals are hippos and I don’t have a favorite color. I love them all. It was love at first sight when hippos became my favorite animal. My dad took my siblings and I took the LA Zoo when we were kids and I saw this huge gray mass in a tank under water. I don’t know what attracted me to hippos but I just love them. The ornament made its arrival on a perfect day, December 5th. I was having a bad day. I had gotten home from the Chiropractor who told me that my neck was out of ligament and he would have to see me three times a week. My firefighter also told me the Christmas wreath we had made from real pine tree clippings that was hanging on our fireplace had fallen and broken one of my firehouses. From all that negative stuff, my hippo ornament brightened up my day.
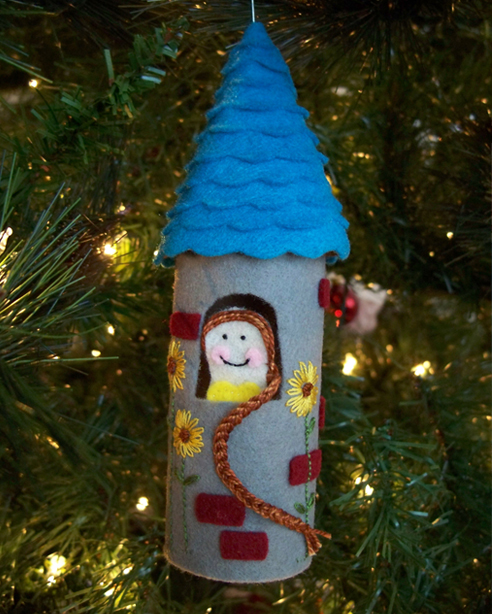
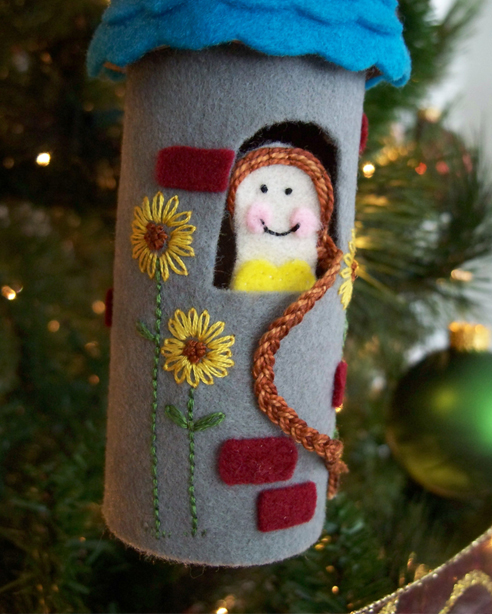

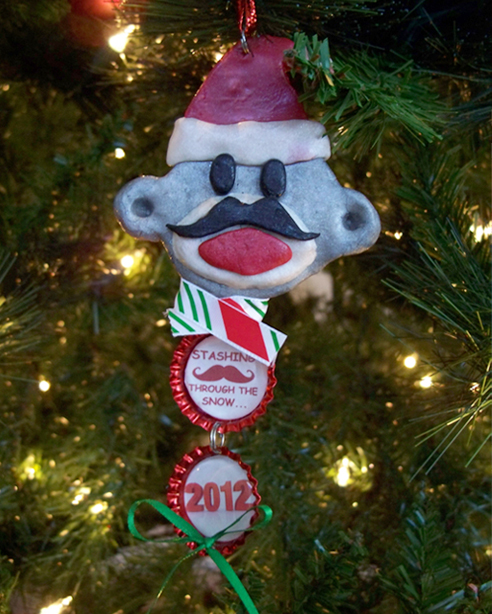
The other ornament I received was from Tristin. I made her the “Princess in Tower” ornament, which she received yesterday and loved. Tristin made me a sock monkey with a mustache made out of clay and bottle caps that said, “Stashing through the snow…” and “2012.” I’m very proud of Tristin. I know she was having trouble with the ornament swap. She says she isn’t crafty but she is. She did a wonderful job making me my ornament, even though her husband helped her a little. I love my sock monkey ornament! I love sock monkeys because they are one of those old homemade toys, made out of socks. For some weird reason I also love mustaches. They make me laugh.

Do you have a homemade ornament hanging on your Christmas tree this year? I have two new ones I absolutely love. Thank you Diane and Tristin!

December 7, 2012

Twelve Days of Creative Christmas: Day 1


I believe the best gifts are those that cannot be bought, like family pictures, heart felt letters, home cooked goodies, heirlooms, and my favorite handcraft gifts. This holiday my goal is to make at least twelve homemade gifts to give to my family and friends.


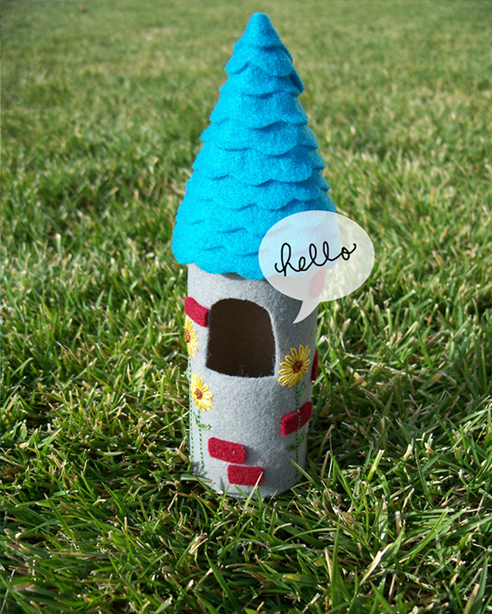
My first homemade gift is an ornament of a princess with flowy long hair. She lives in a tower where her favorite flowers, sunflowers, grow around it. This “Princess in Tower” ornament was made for Tristin, one of my Ornament Swap partners and she is also one of my employees. Her favorite flowers are sunflowers and she has beautiful long hair.

The idea to make this ornament came from Pinterest. Click here to see my inspiration. I can’t take all the credit for myself.

I used felt to make the ornament and I hand embroidered the sunflowers. This ornament took lots of time and patience. My firefighter asked me if it was a toy. It does look like something a child would use to play dolls with. He also told me to stop looking at it constantly, that it wasn’t going to change. I kept looking at it because I was very happy how it turned out. Sometimes I tell myself, “I can’t believe I made that. It looks so good.”

All of my handcrafted gifts have my initials on them and the year they were made. That way people will never forget who made it for them and when it was made. I will give Tristin her ornament today at our work’s Christmas party. I know she’ll love it!

If you're interested in a custom “Princess in Tower” ornament, please contact me for pricing. 

December 3, 2012

Christmas Mood Up In Here, Up In Here


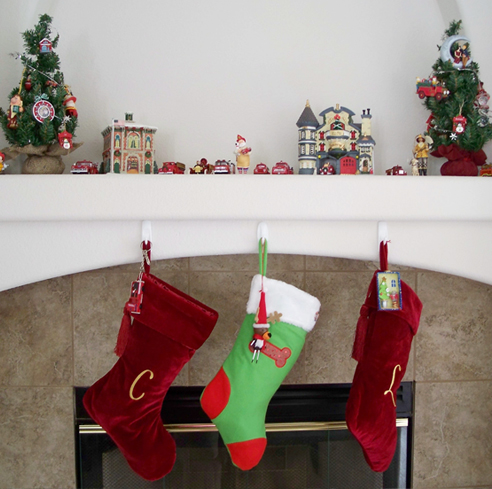
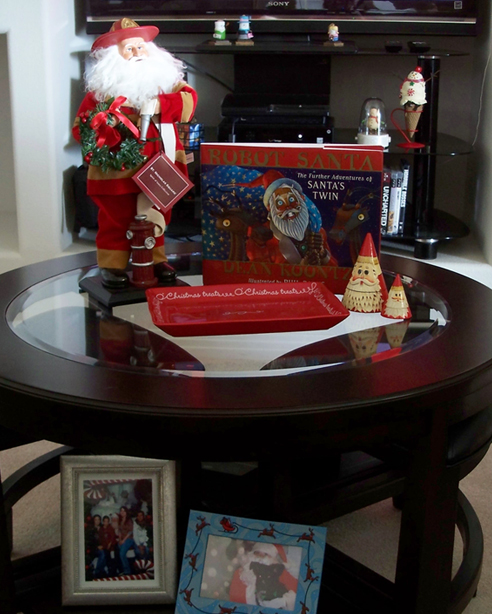
I’m feeling quite cheery today. Most of my Christmas decorations are up and I’m totally into the Christmas spirit this year. Last year, my firefighter and I didn’t put up the Christmas tree. We had gotten new furniture for our small living room last year and that’s where we put our Christmas tree. Since the tree is big we thought there wouldn’t be enough room for it. Were we wrong! I took the coffee table out and wallah hello Christmas tree!

To be honest I’m starting to enjoy the holidays again because this might be my firefighter and mine last Christmas together, just him and I. Oh, don’t freak out! We’re happily married. My firefighter and I have decided it’s time to add to our family. Smiling sheepishly. If it is in God’s plan, there will be another stocking hanging off the fireplace next year.

For now, I’m enjoying life as it is. However, as I decorate for Christmas I catch myself day dreaming of little hands helping me put ornaments on the Christmas tree, baby’s first ornament, baking cookies for Santa, pictures with Santa…. oh I can’t wait!

December 24, 2011

2011 Homemade Christmas Ornament


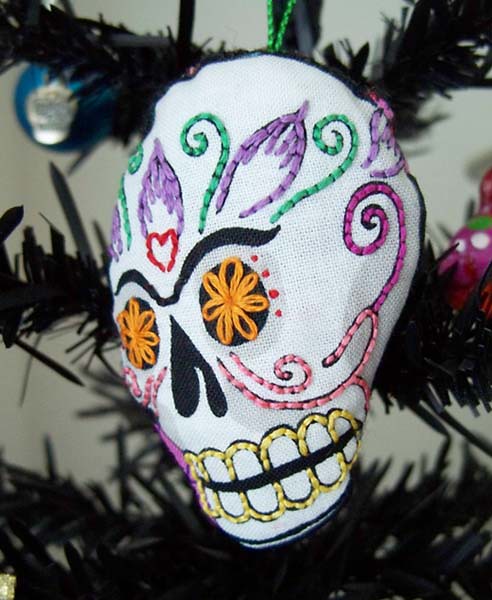
I’ve made a new Christmas tradition for myself this year – to make an ornament for me! I made myself a Day of the Dead ornament from left over fabric my friend had, after making me a Day of the Dead bag. I embroidered the Day of the Dead skull and made it into an ornament. I even gave it a unibrow like Frida Kahlo, one of my favorite artists. It’s hanging on a little black Christmas tree I purchased last year to hang my Day of the Dead ornaments. I love the way my ornament came out! Merry Christmas to me!

What’s your favorite ornament this year?

December 5, 2011

D.I.Y. Stocking Garland from Recycled Cards

Ever wonder what to do with old Christmas cards? Make them into garland! A stocking garland that is!


Supplies: Christmas cards, stocking stencil, scissors, pen, hole puncher and ribbon. 1. Trace stocking stencil onto Christmas cards. 2. Cut stockings. I wrote who the card came from behind each stocking. 3. Hole punch top of stockings. 4. Tie the first stocking trough the ribbon leaving enough ribbon to tie the remaining stockings. 5. Display stocking garland!
Related Posts Plugin for WordPress, Blogger...