Showing posts with label diy. Show all posts

September 26, 2017

Halloween Crafts: Fun Toddler Cards

I helped Lil make her first Halloween cards and they came out so stinking cute. I just had to share them with you and how we made one - the cat/pumpkin card. Yeah, I know, another toddler, mother assisted, tutorial. I helped Lil make three cards. We made them all pretty much the same way.

Supplies

Scissors,
Recycled Stickers (What’s left of the sticker sheet after you remove the sticker),
Crayons,
Googly Eyes (Everything is more fun with google eyes),
Blank Card (I got Lil a 50 pack of blank cards at Michael’s, last year, to make footprint and handprint birthday cards),
Glue Stick,
Stamp Markers (Purchased at Target’s dollar aisle). 


1) Have your toddler stamp the blank card first. Lil couldn’t get a good stamped image from the stamp markers so I had to help her. They’re not the best stamp markers because they are small but they do the trick for a dollar.

2) Cut around the recycled stickers and place them on the card. I cut a group of pumpkin recycled stickers. I showed Lil how to make a pumpkin face on one of the pumpkins. I was thrilled to watch her draw her first smiley faces on the pumpkins. She added stems and a leaf to each pumpkin. Then, I let Lil doodle the card. I also taught her how to draw a bat. She drew two bats, flying near a full yellow moon she doodled. 


3) Embellish with regular stickers. I added a cat sticker on the pumpkin of Lil’s choice.


4) Have your toddler help glue the google eyes, with the glue stick. Lil has gotten better at gluing small objects because she uses a glue stick regularly, when making crafts at Preschool Storytime, at the library.

I’m sorry for not providing pictures with each step. I wasn’t planning on making a tutorial with these cards, since it was an out of the blue (totally unplanned) Halloween craft. I had so much fun helping and watching Lil make the cards; I had to share our process with you, that way you could make them by yourself or with a little artist too. 


I was going to give the card with the cat and pumpkins to a friend but I decided to keep it. Come on, the card has Lil’s first drawn smiley faces and bats. I couldn’t bare to part with it. I had Lil make another card, the one with the spider, for my friend instead. Lil made these two cards a few weeks ago. 


We have been making many Halloween themed crafts lately; Lil keeps asking me almost everyday what Halloween crafts we are going to do next. On Sunday, Lil decided she wanted to craft again before bedtime. I helped her make the candy/ghost card pictured above. Yes, I’ve created a little craft monster! 

If you missed last week's, Halloween craft post, click HERE to check it out. 


May 9, 2017

DIY Customizing Toddler Doodle for Mother's Day

I love giving close family and friends homemade gifts and I found a great way to incorporate my toddler's doodles by making these awesome custom word/name picture frames. Currently, my daughter's favorite new art medium is markers. I try to get her to use different mediums, for example  crayons and markers. Sometimes she does, but she really likes working with just markers right now, especially the scented kind. Making these custom picture frames are my favorite gift I help Lily make. With Mother's Day just around the corner, these custom word/name picture frames would make the perfect Mother's Day gift.


Supplies
White and Black Card Stock Paper, 
Paint, Crayons, or Markers (or all three),
Black Frame (I get mine at the 99 cent store),
Scissors,
Scrap Paper,
Pencil,
X-Acto Knife, and
Cutting Board.


Step 1: Have your child doodle on white card stock paper. I give Lily at least a week to finish a doodle. It goes faster if she is using paint. She's a toddler, so sometimes she can't sit and doodle for a long time. I give her a week because she doesn't doodle everyday and the more she doodles on the paper the more the cut out word/name will stand out. Avoid letting your child use black markers because it will end up blending in with the background when you insert the black card stock paper, at the end.

On a side note, I found this great article on the importance of having your child doodle.  Click here to read it. ]


Step 2: Grab your frame and remove the backing leaving the actual frame and glass only. Move it around the doodled paper until you find a background you like.


Step 3: Trace around the glass with a pencil. Then cut it out.


Step 4: Using your scrap piece of paper draw out the word/name you want. Cut it out and arrange it on your doodled paper. 


Step 5: Trace the letters that make up the word/name on your doodled paper.


Step 6: Place your doodled paper over a cutting mat and very carefully cut out the traced word/name with an X-Acto knife.


Step 7: Use the doodled paper to trace over the black card stock paper. Cut it out and insert it behind the white paper. Put the frame back together and TA-DA you're done! 

I have helped Lily make 4 of these custom word/name picture frames for very close family and friends and every recipient has absolutely loved it. When we made one for my parents, my brother suggested I cut out Lily's name on the doodled paper, that way they could display it near her photographs. Other good Mother Day themes for Grandma's would be Nana, Grammie, Grandma, I Love You (use the shape of a heart for love), or any other special word Grandma uses. 

I have been wanting one of these frames for myself and I hope I can finally get Lily to make me one for Mother's Day. I think I want my picture frame to say Mama. 

Please let me know if you find this tutorial useful. Better yet, let me know if you try it out with your child. 
SaveSave

June 24, 2016

Friday Frida Favs: D.I.Y. Viva La Vida Watermelon Stamp


The Viva La Frida Craft Swap is almost coming to an end. There's a week left before swap packages need to be shipped. I actually received mine this week, which encouraged me to hurry up and ship my swap partner's package on Tuesday. Before I mailed out her package, I stamped the box with this homemade watermelon stamp, inspired by Frida Kahlo's Viva La Vida still life watermelon painting.  Watermelons are one of my favorite symbols that reminds me of Frida Kahlo and I wanted to include it as part of my swap gift.

Let's get stamping!


Supplies: Lid of an egg carton (also called Polystyrene), scissors, paper/box, ink pads, and pen (not pictured).


Step 1: Cut the flat part of the egg carton lid.


Step 2: Cut the inside of your watermelon shape. You can use a pen to draw the watermelon but I just went for it.


Step 3: From the piece you cut, cut an outer portion of it to make the skin for your watermelon.


Step 4: Press your cutout pieces onto your ink pads.


Step 5: Press the stamp onto your printing surface. If you like, you can use a pen to draw some watermelon seeds on the actual stamp. This causes an indention, and the drawn seeds will not get ink on them when you're stamping it.


Here's another stamp idea, using a cactus design. Draw your cactus shape on the egg carton lid with a pen, cut it out, indent small holes onto the cactus shape using your pen, then ink and stamp. Doddle flowers on it or even a Frida face. 

I hope you enjoyed this cute, quick, and extremely easy stamp tutorial. It's a great way to add a little creative touch to the package you are sending. I personally think it makes the receiver more excited to open the package.

As this swap comes to a close, I am looking forward to seeing all the wonderful Frida inspired crafts made by the 20 ladies that signed up. I have already gotten a glimpse of a few, which makes me overjoyed!

For more Friday Frida Favs, head over to my Frida Kahlo loving sister's blog, The Morose Bee, for another dose of Frida Kahlo inspiration.

Happy FRIDAy!


October 27, 2013

The Giving Tree Costume

When I was in my book club, The Bookies, we celebrated our first year anniversary by dressing up as a character from our favorite book. One of my favorite books is, “The Giving Tree” by Shel Silverstein. If you haven’t noticed, I’m a big kid at heart. My favorite character in the book is the tree, not that there is many to choose from. I wrapped myself in brown construction paper and… okay, I’m kidding. I made my costume as simple as possible and it included everyone in the book, the tree and the boy. I won first place with this costume at book club.

Bag of Apples/Supplies: White shirt, black dimensional fabric paint, red, green, and brown felt, white fabric, polyester stuffing, hair tie, transfer sheets for ink jet printers, printer, scissors, small button, sewing needle, sewing machine, hot glue gun, embroidery thread, iron, scanner, and “The Giving Tree” book.

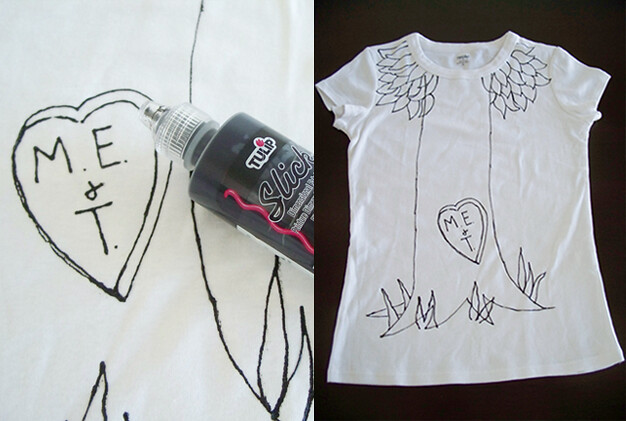
Apple 1: Draw your giving tree with dimensional fabric paint on your white shirt, with the leaves around the collar. Don’t forget the M.E. + T carved into the tree.

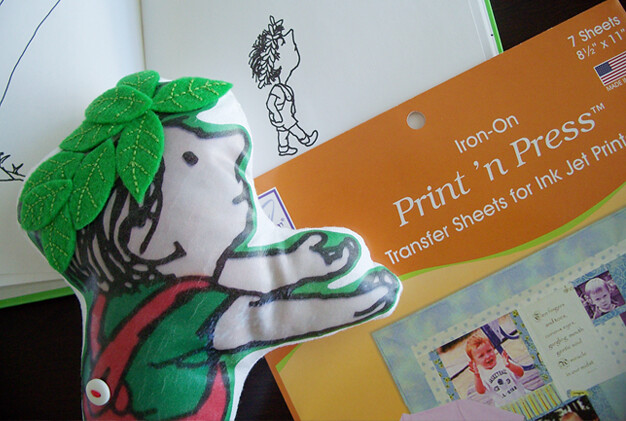
Apple 2: Scan the picture of the boy from the front cover of the book. It’s important to follow directions from the transfer paper. Print image on transfer paper and iron onto white fabric. Sew button on boy’s overalls. Cut fabric around boy.  Place it over another piece of white fabric, trace it, and cut the traced fabric out. Sew both pieces together with the image of the boy inside. Leave an opening to turn it inside out. Stuff your boy doll and hand sew the opening shut. Cut leaves out of green felt and embroider them with a lighter shade of green with embroidery thread. Glue the leaves to the boy’s head. Now, he has his little crown of leaves.
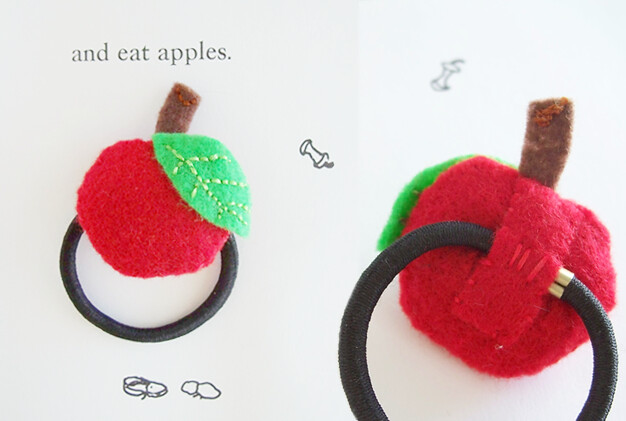
Apple 3: Make an apple with a leaf and stem using your felt. Sew the apple pieces together and stuff your apple. Cut a rectangular piece of red felt. Place it over the back of your apple with the hair tie between them, and sew it on the apple. Repeat this step if you would like to be a tree with many apples.

Apple 4: Put your tree shirt on, braid your hair (or wig if your hair is short) and tie your apple hair tie with it. Your hair will represent the tree’s branches with apples in them. Hold your boy and give him lots of love. Carry the book with you for those who need an extra hint to guess who you are for Halloween. If you have brown pants, wear them!

I don’t have a picture of myself in this costume. I don’t think I can fit into the shirt again and I’m rocking short hair now. I hope you can envision “The Giving Tree” costume put together by the pictures above. If you make this costume, I would love to see it. Please do share!

October 20, 2013

DIY Spider Web A Halloween Card

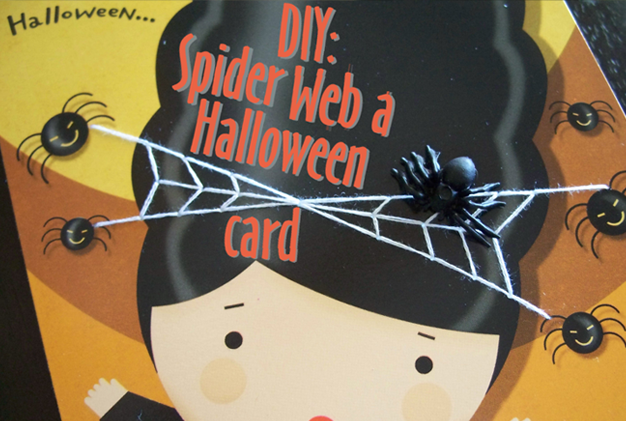
Add a little dimensional touch to a simple Halloween card and make it spooktacular, by embroidering a spider web.

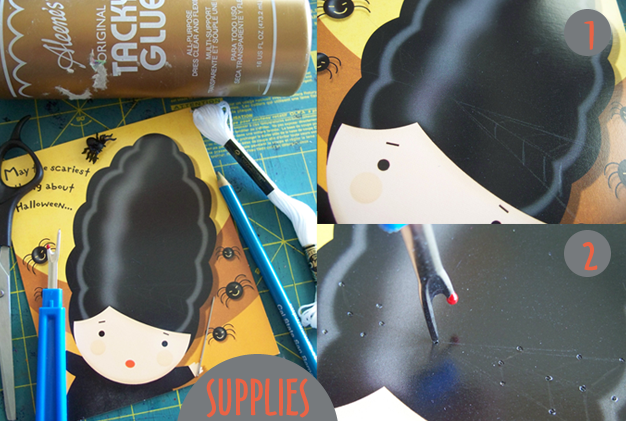
Supplies: A simple Halloween card (if it has spiders on it, the better), fake rubber spider, craft glue, scissors, seam ripper, thin sewing needle, pencil, cutting mat, and white embroidery thread (if you have glow in dark thread it’s more fun)!

Spider 1: Draw where you would like to embroider your spider web on your card. I connected my web drawing to the spiders on the card and wanted the spider web to look like a bow on the little girl’s hair. The outside of the card says, “May the scariest thing about Halloween….” inside “not be your hair.” 

Spider 2: Place your card over your cutting board. Grab your seam ripper and twist it back and forth to make holes where you will connect your stitching.
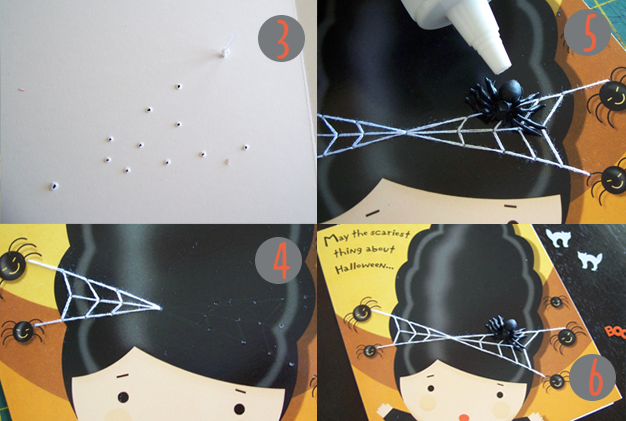
Spider 3: Use two threads, insert them in your needle, and make a knot at the end of the thread. Start sewing from the inside of the card to hide the knot.

Spider 4: Start embroidering by connecting the dots/holes.

Spider 5: Glue the fake rubber spider to your new embroidered spider web.

Spider 6: Send the Halloween card out.

I hope you enjoy this tutorial. It's very easy and only takes a few minutes. 
  

October 13, 2013

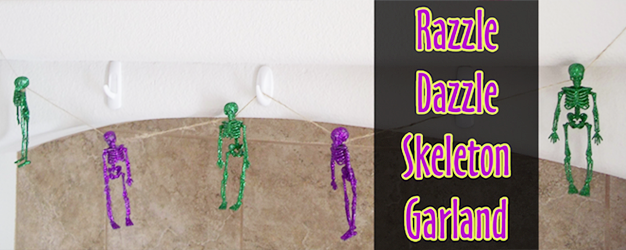
Razzle-Dazzle Skeleton Garland


My friend Amanda made some of these glittery skeletons last year for Halloween. They looked so cool hanging in her house and I told myself I would try making them this year.

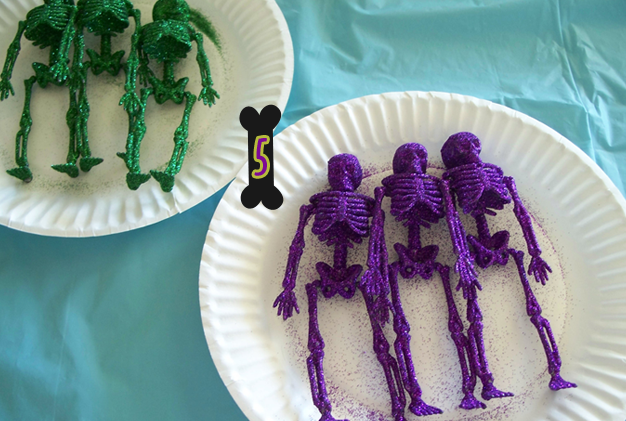
Bag of Bones/Supplies: Mod Podge, sponge brush paint brush, glitter shakers, skeleton garland, and paper plates. Glitter shakers and skeleton garland were purchased at the 99cent store, but I suggest buying better quality glitter.

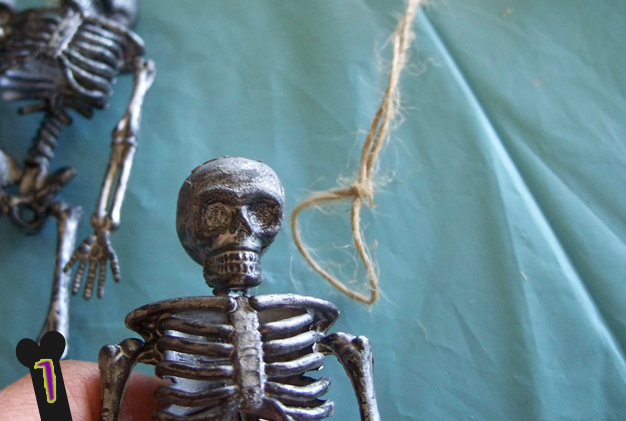
Bone 1: Remove the skeletons by loosing their noose.

Bone 2: Put some Mod Podge on a paper plate.

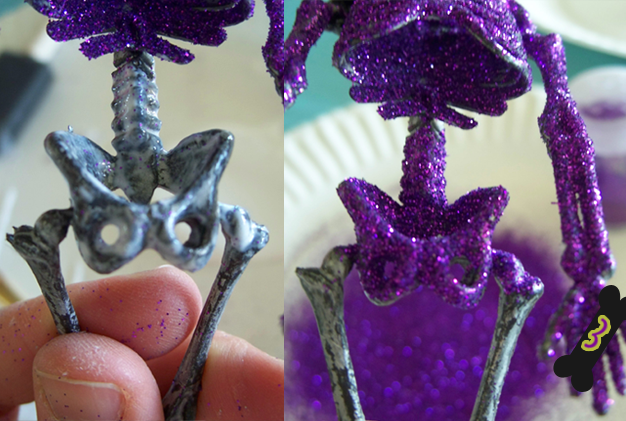
Bone 3: Brush Mod Podge on a skeleton in sections then sprinkle glitter on the section you mod podged, over another plate. Tap skeleton against plate to shake excess glitter.

Bone 4: When your shaker is empty, fold your paper plate in half and pour glitter back into the shaker.

Bone 5: Switching colors? Repeat bone (step) 3 and 4 over a different plate.

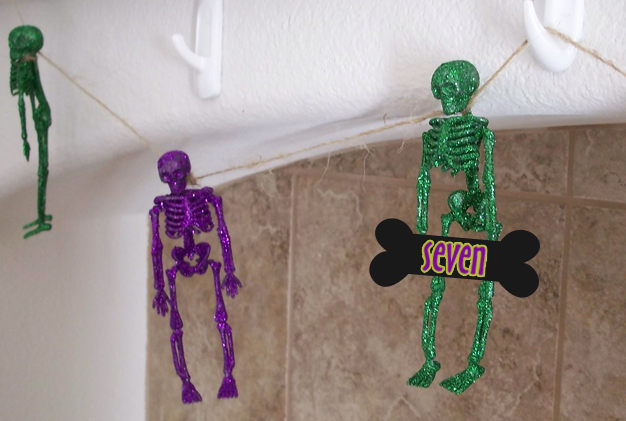
Bone 6: Grab your empty nooses and hang your razzle-dazzle skeletons.

Bone 7: Display your razzle-dazzle skeleton garland.

Wondering where the orange skeletons are? Well, what can you expect from 99cent glitter. Not only did the orange glitter look brown on the skeletons but when I hung the skeletons in bone/step 6 some of the purple and green glitter on the skeletons fell off.

Thank you Amanda for letting me share how to make these glittery skeletons to my readers!

September 21, 2013

DIY Car Art Hanger


I made this car art hanger for my nephew Isaac. He is our little artist and loves to play with toy cars. He turns two years old today. I haven’t met him yet. Hopefully, I’ll get to finally meet him this Christmas. Since I can’t be there to give him all my love on his birthday, I made him this homemade gift with lots of love.

Supplies: 2 unfinished wooden cars, 6 clothespins, acrylic paint, paintbrushes, Mod Podge, silver plastic canvas cord, felt, sewing needle, thread, glue gun, and sawtooth hangers (or anything you can use to hang a frame). I got most of my supplies at Joann's fabric and crafts store.

Green Light 1: Draw the details you want on your cars (like headlights, door handles, steering wheel, fuzzy dice, and hub caps) with a pencil.

Vroom 2: Paint your cars and the clothespins. You’ll need many layers of paint. I painted the clothespins red, yellow, and green to match the colors of a stoplight.

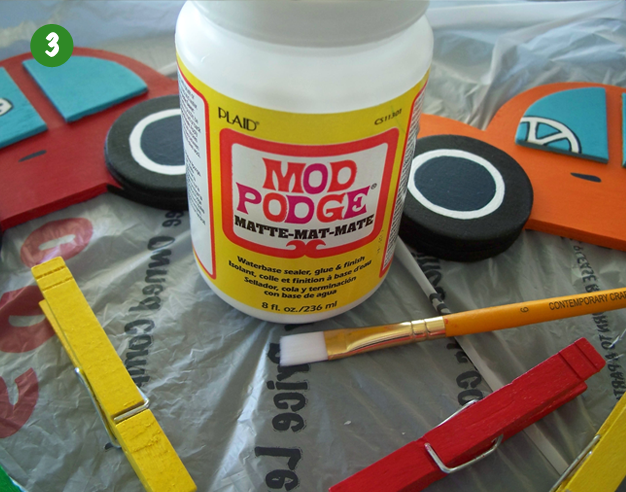
Vroom 3: Seal your painted items with two coats of Mod Podge Matte sealer, to protect the paint.

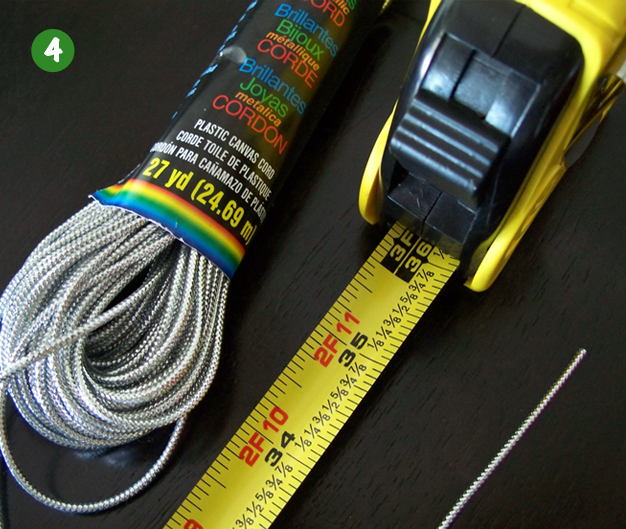
Vroom 4: Cut 3 feet (36 inches) of plastic canvas cord.

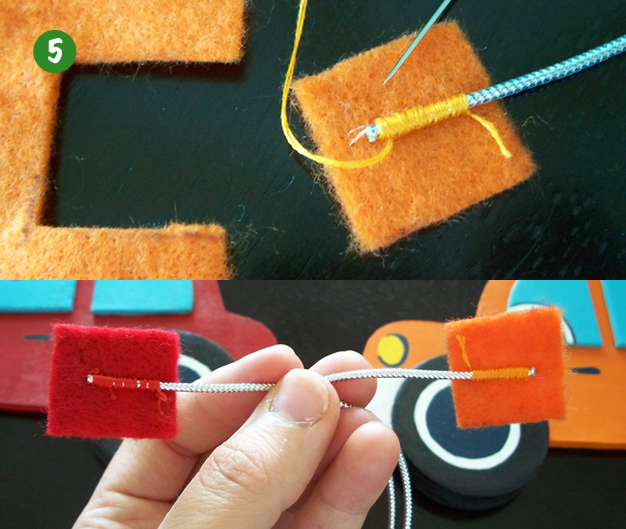
Vroom 5: Cut two square pieces of felt, 1 inch by 1 inch. Hand sew one end of the cord to a felt square then do the same to the opposite side. Make sure the cord is not twisted and it’s facing the same direction.

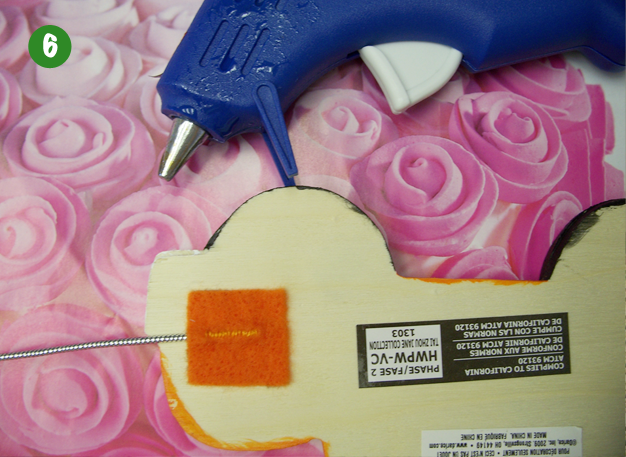
Vroom 6: Glue one square behind one of the cars and glue the remaining square to the other car. You want to glue the side of the square where you can see the cord, so you can hide the stitching.

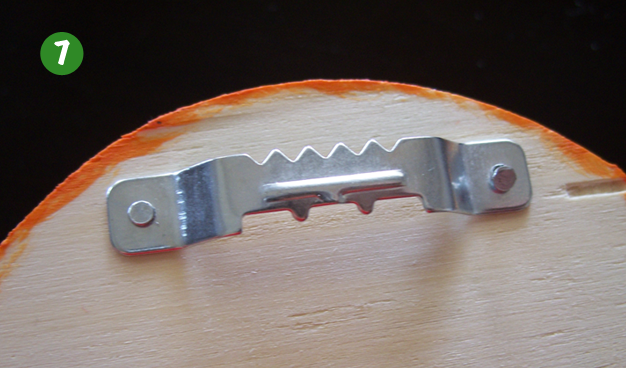
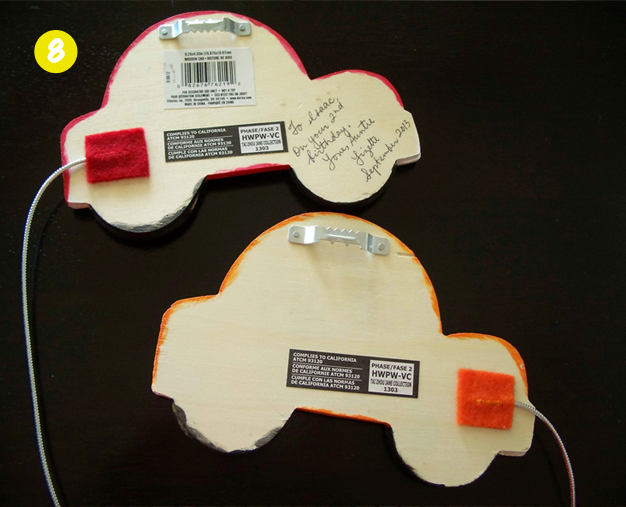
Vroom 7: Nail the sawtooth hangers behind each car. My firefighter did this for me.

Yellow Light 8: (Optional) Write a special message on the back of one of the cars.

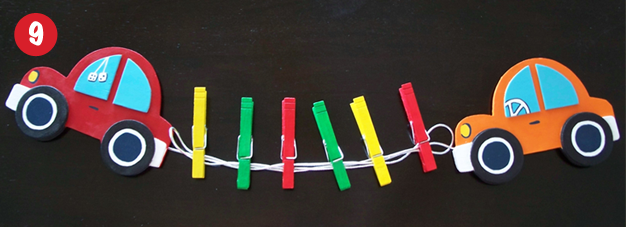
Stop 9: Park your car art hanger on a wall! 

Isaac can proudly display his artwork, birthday cards, or even family pictures on his car art hanger.

Happy Birthday my little man!
Related Posts Plugin for WordPress, Blogger...