Showing posts with label Tutorial. Show all posts

September 26, 2017

Halloween Crafts: Fun Toddler Cards

I helped Lil make her first Halloween cards and they came out so stinking cute. I just had to share them with you and how we made one - the cat/pumpkin card. Yeah, I know, another toddler, mother assisted, tutorial. I helped Lil make three cards. We made them all pretty much the same way.

Supplies

Scissors,
Recycled Stickers (What’s left of the sticker sheet after you remove the sticker),
Crayons,
Googly Eyes (Everything is more fun with google eyes),
Blank Card (I got Lil a 50 pack of blank cards at Michael’s, last year, to make footprint and handprint birthday cards),
Glue Stick,
Stamp Markers (Purchased at Target’s dollar aisle). 


1) Have your toddler stamp the blank card first. Lil couldn’t get a good stamped image from the stamp markers so I had to help her. They’re not the best stamp markers because they are small but they do the trick for a dollar.

2) Cut around the recycled stickers and place them on the card. I cut a group of pumpkin recycled stickers. I showed Lil how to make a pumpkin face on one of the pumpkins. I was thrilled to watch her draw her first smiley faces on the pumpkins. She added stems and a leaf to each pumpkin. Then, I let Lil doodle the card. I also taught her how to draw a bat. She drew two bats, flying near a full yellow moon she doodled. 


3) Embellish with regular stickers. I added a cat sticker on the pumpkin of Lil’s choice.


4) Have your toddler help glue the google eyes, with the glue stick. Lil has gotten better at gluing small objects because she uses a glue stick regularly, when making crafts at Preschool Storytime, at the library.

I’m sorry for not providing pictures with each step. I wasn’t planning on making a tutorial with these cards, since it was an out of the blue (totally unplanned) Halloween craft. I had so much fun helping and watching Lil make the cards; I had to share our process with you, that way you could make them by yourself or with a little artist too. 


I was going to give the card with the cat and pumpkins to a friend but I decided to keep it. Come on, the card has Lil’s first drawn smiley faces and bats. I couldn’t bare to part with it. I had Lil make another card, the one with the spider, for my friend instead. Lil made these two cards a few weeks ago. 


We have been making many Halloween themed crafts lately; Lil keeps asking me almost everyday what Halloween crafts we are going to do next. On Sunday, Lil decided she wanted to craft again before bedtime. I helped her make the candy/ghost card pictured above. Yes, I’ve created a little craft monster! 

If you missed last week's, Halloween craft post, click HERE to check it out. 


May 20, 2016

Friday Frida Favs: DIWM Frida Kahlo Handprint Portrait Tutorial


Hey (I currently say “Hey” instead of “Hi”) everyone! It’s me Lily! This is my first post on my mama’s booger, I mean blog on Creativity Lizette. Guess what? I’m creative too! I saw how much fun my Mama was having with Friday Frida Fav and I thought to myself, “No fair! I want to join in the Frida fun too!” Since I’m little, I asked my Mama for help with a Frida art project I had in mind. Today, my mama and I bring you this awesome Frida Kahlo handprint portrait tutorial or what I like to call Do It With Mama or Mommy (I call my mom, Mama) tutorial.

This is almost like finger painting (I love painting) only that your parent has some but not all control were the prints are going. This DIWM tutorial is not a one day project. Come on, I’m a toddler; I have a shot attention span and get easily distracted. What was I talking about? Oh, yeah! I tell my mama, “No more!” When I am done with what I am doing and want to move onto something new, like reading a book. It took my mama and I a couple of days to complete this Frida handprint portrait. Remember, time and patience is needed when working with a toddler. I should know, I’m a toddler! Without further ado, here’s my Mama. She’s going to take over while I go have a snack. “Mama, chip?”


This mother and daughter project was inspired by 1939’s French Vogue magazine cover of Frida Kahlo, taken by photographer Nickolas Muray.

Supplies (Not Pictured):
Green Paper (background), Paint needed is White (for face and ribbon on sacred heart), Brown (for hair), Yellow (inside of the flowers and middle flame above scared heart), Pink (flower pedals), Black (unibrow), Light Pink (cheeks), Blue (earrings), Red (Heart), orange (outter flames above sacred heart), paint brushes, water, paper towel, a plastic bag (this is were I pour the paint onto, a black pen, and of course a willing toddler and a patient parent.


Paso (Means Step) 1: For Frida’s face, I painted Lily’s palm white, not including the fingers, and pressed it onto the green paper. Make sure you leave enough space underneath for the sacred heart.

Paso 2: For Frida’s hair, I painted Lily’s left thumb brown and pressed it horizontally on the top, left part of Frida’s head. Then I did the same with her right thumb and pressed it on the opposite side of Frida’s head.

Paso 3: For the inside of the flowers, I painted the the tip of Lily’s pinky yellow and pressed it above Frida’s head. We did this four times leaving small gaps in between for the flower pedals. Let dry before you continue onto the next step.

Paso 4: For the flower pedals, I painted the tip of Lily’s middle finger pink and pressed it around the yellow finger print. Repeat until you make a flower pattern then move onto the next yellow circle. There is no need to wait for the flower pedals to dry since they are all the same color, unless you want the flowers to be different colors.


Paso 5: For Frida’s signature unibrows, I actually painted the outter side of Lily’s left pinky finger black  and pressed it horizontally on the left side of Frida’s head. I repeated the same step with her right finger and connected it to the left unibrow.

Paso 6: For Frida’s cheeks, I painted the tip of Lily’s left thumb pink and pressed it on the left side of were Frida’s cheek should be. I did the same thing with her right thumb on the opposite side were the first cheek got printed.

Paso 7: For Frida’s earrings, I painted the tip of Lily’s ring finger and pressed on the outter left middle part of Frida’s head. Repeat the same “paso” with the right finger on the opposite side.

Paso 8: You want to print the sacred heart below Frida’s head. I painted Lily’s index finger red and pressed it slightly side ways towards the left. Then I painted the same finger and overlapped it on the bottom of the last print pressing it slightly towards the right, creating the shape of a heart. Let dry.

Paso 9: For the flame above the sacred heart, I painted the tip of Lily’s picky finger orange and pressed it on the top middle part of the heart. Let dry.


Paso 10: I painted the tip of Lily’s ring finger yellow and pressed it on the left side of the orange flame print and then I painted the same finger again and pressed it on the right side of the orange flame print.

Paso 11:  For the ribbon over the sacred heart, I painted Lily’s picky finger white and pressed it across the heart. I wiped her finger off and painted the tip of her picky finger white and pressed it on the front but slightly over the front of the ribbon. Then, I painted the tip of the finger again and pressed it on the opposite just like the last print.


Paso 12: This is my favorite “paso” because it makes everything come together. Grab your black pen and outline the pedals making them look like flowers, create earrings for Frida, give Frida eyes, a nose, and a smile with lips, outline your sacred heart, draw flames, outline your ribbon, and write Frida’s name in the ribbon. Lily moved her hand a lot during this mommy and daughter collaboration; nonetheless, the quality time, memories, and finished project was well worth it. This is now framed and displayed on our fireplace.

Hey guys, I’m back! It's Lily! I hope you enjoyed this Do It With Mama tutorial that my mama and I put together for you. If you decide to make your own Frida Kahlo handprint portrait like mine, please share it with us on Instagram using the hashtag #fridahandprintportrait or email us a picture to creativitylizette@yahoo.com Mama says sharing is good.

Mama says, “Don’t forget to sign up for Bee Creative SwapsViva La Frida Craft Swap. Tomorrow is the last day to sign up.”

Happy FRIDAy from my Mama and me, Lily! “Mom, chip?”


September 21, 2013

DIY Car Art Hanger


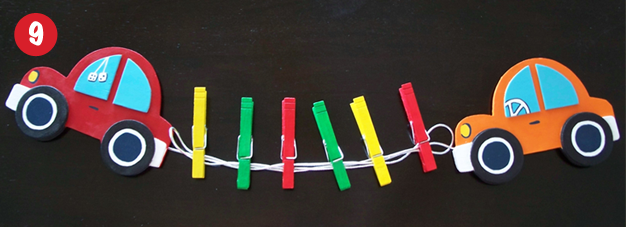
I made this car art hanger for my nephew Isaac. He is our little artist and loves to play with toy cars. He turns two years old today. I haven’t met him yet. Hopefully, I’ll get to finally meet him this Christmas. Since I can’t be there to give him all my love on his birthday, I made him this homemade gift with lots of love.

Supplies: 2 unfinished wooden cars, 6 clothespins, acrylic paint, paintbrushes, Mod Podge, silver plastic canvas cord, felt, sewing needle, thread, glue gun, and sawtooth hangers (or anything you can use to hang a frame). I got most of my supplies at Joann's fabric and crafts store.

Green Light 1: Draw the details you want on your cars (like headlights, door handles, steering wheel, fuzzy dice, and hub caps) with a pencil.

Vroom 2: Paint your cars and the clothespins. You’ll need many layers of paint. I painted the clothespins red, yellow, and green to match the colors of a stoplight.

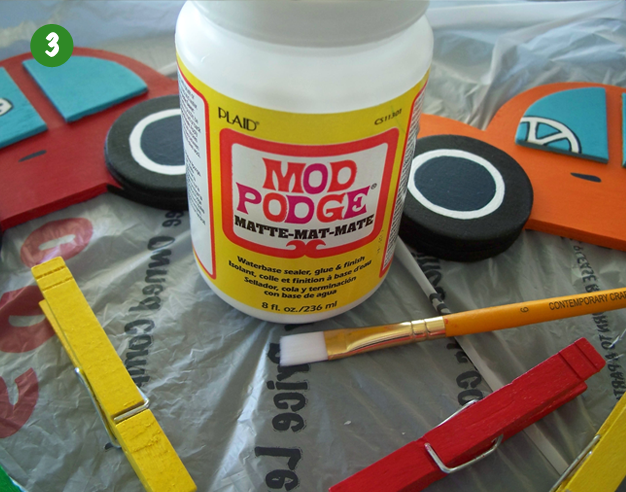
Vroom 3: Seal your painted items with two coats of Mod Podge Matte sealer, to protect the paint.

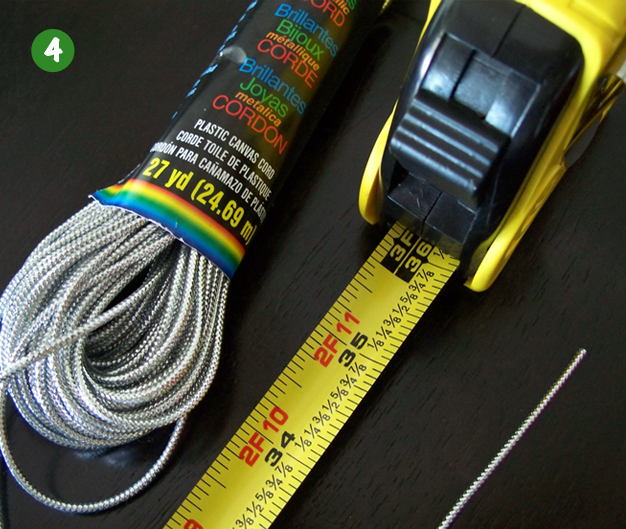
Vroom 4: Cut 3 feet (36 inches) of plastic canvas cord.

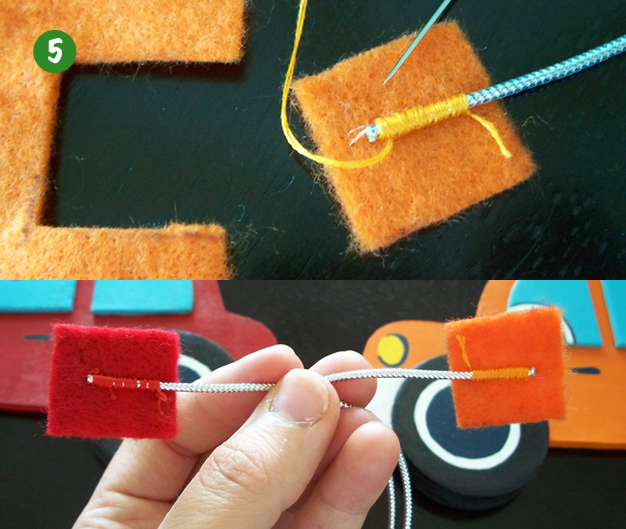
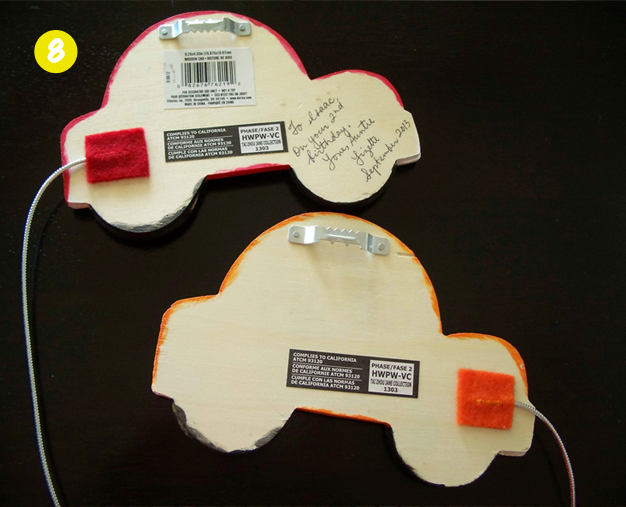
Vroom 5: Cut two square pieces of felt, 1 inch by 1 inch. Hand sew one end of the cord to a felt square then do the same to the opposite side. Make sure the cord is not twisted and it’s facing the same direction.

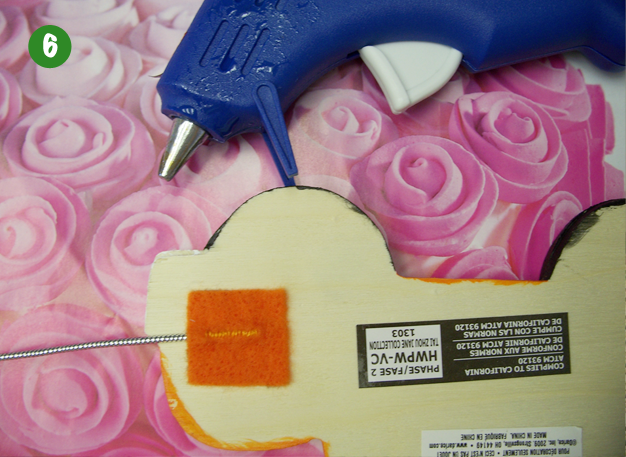
Vroom 6: Glue one square behind one of the cars and glue the remaining square to the other car. You want to glue the side of the square where you can see the cord, so you can hide the stitching.

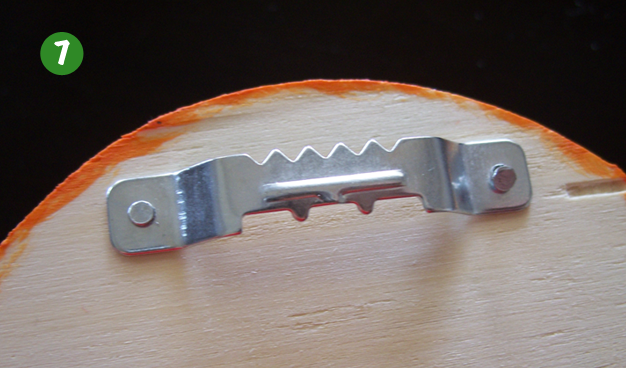
Vroom 7: Nail the sawtooth hangers behind each car. My firefighter did this for me.

Yellow Light 8: (Optional) Write a special message on the back of one of the cars.

Stop 9: Park your car art hanger on a wall! 

Isaac can proudly display his artwork, birthday cards, or even family pictures on his car art hanger.

Happy Birthday my little man!

June 26, 2013

Hair Tutorial: Shy Pigtails


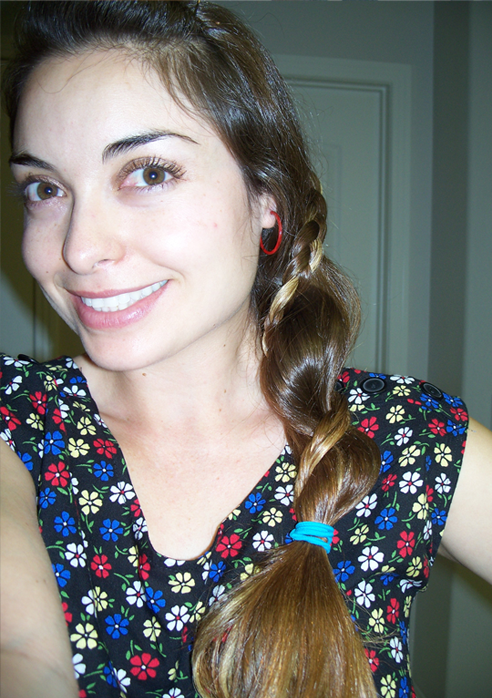
Here’s another fun hair tutorial, that I call the shy pigtails. I love this look and it’s so easy to do. It makes my hair look short. Once again, the video is not the best quality since I recorded it on my Kodak EasyShare C875 camera. It’s a very old camera. I think it's time for me to start saving my pennies and get a new one. For now, it does the job.

In the video, my shy pigtails are closer to my head because I made the knot as close to my head as possible. To achieve the look like in the picture above, knot your pigtails a little lower.

June 22, 2013

Hair Tutorial: Roping The Ponytail


This is my first hair tutorial. It’s not perfect but I hope you like it. I recorded it on my camera.

Update: Added my video to YouTube; now you can watch the video from beginning to end. 


March 7, 2013

The Flowers in Frida’s Hair


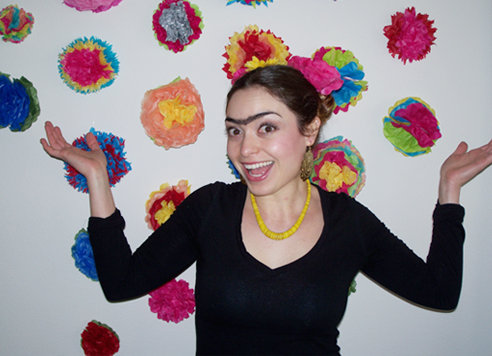
Bee Creative Swaps’ first swap was titled, “Artist Swap” where we made an art piece inspired by the artist our partner chose. My swap partner was Emily, co-founder of Bee Creative Swaps and blog owner of The Morose Bee, and her artist of choice was Frida Kahlo! Lucky me right? As a bow for Emily’s swap package, I made a tissue paper flower inspired by the flowers in Frida’s hair. I loved the way it turned out and had to include tissue paper flowers in my “Celebrate Life Frida Style” birthday party.

With the help of my friends, Amanda and Christi, we were able to make 23 beautiful tissue paper flowers of different colors. Click here for the flower tutorial. Thank you Amanda and Christi! The majority of the flowers were made out of recycled tissue paper I had been saving from the holidays and birthdays. Let’s admit it, we crafters are slight hoarders.


I was fascinated by the outcome of the flowers and the making process that I ended up staying up very late one night making more to use as garland. However, these were solid color and fluffed all the way around. Click here for tutorial used.

On the morning of my fiesta (party), Amanda came by to help me hang my decorations. My papel picado banner made of plastic was purchased at Amols.com and hung on my front porch. My Catrina on my front door held my flower garland. Amanda also helped me hang the rest of the tissue paper flowers with clear packing tape on one of the walls in my house, you notice when you first walk in. This wall became the photo backdrop for my guests. From all the decorations at my party, the photo backdrop still remains up.

February 25, 2013

DIY Mini Piñata Candy Jar


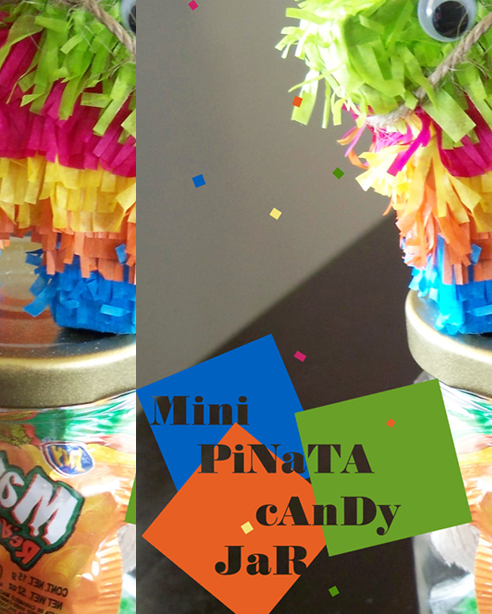
The weather was going to be cold outside; it wasn’t a kid’s party though others can say otherwise, and I wanted Mexican candy for my “Celebrate Life Frida Kahlo style” birthday party and making mini piñata candy jars instead of purchasing a big piñata was the perfect solution.

Save a piñata and make a candy jar. The piñata will be glad, for other reasons, and so will you!

Supplies: Empty sauce jars, green scrubber sponge, spray paint, cardstock/cereal box, masking tape, craft glue, paintbrush, scissors, pencil, assortment of colorful tissue paper, glue gun, and candy of your choice.


Dale 1 (Dale means hit in English. Dale comes from the Mexican song the crowd sings while someone is hitting the piñata): Wash the sauce jars out and use a green scrubber sponge to remove the sticking glue left on the jar from the jar label.

Dale 2: Spray paint the lids. My firefighter spray-painted mine. I’m a bad spray painter.

Dale 3: Make your mini piñatas. I can’t take credit for this step. I used CampFire Chic blog and Oh Happy Day blog to help me make the mini piñatas. Make your piñatas your own. I added googly eyes and a hemp saddle to my donkeys.


Dale 4: Glue mini piñata onto jar lid with your hot glue gun.

Dale 5: Put candy in jars. You know you’ll have a candy while stuffing the jars. I did.

Mini piñata candy jars also make great centerpieces and the perfect party in a jar to give as a birthday gift with the recipient's favorite candy.

February 19, 2013

DIY Viva La Vida Watermelon Invitations


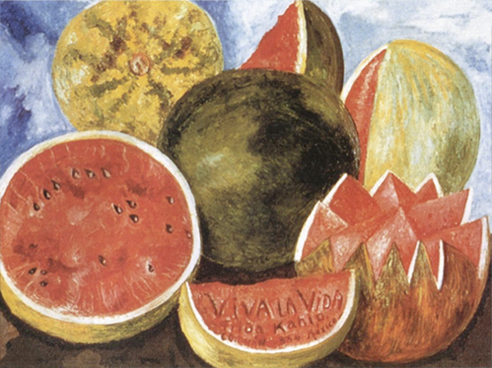
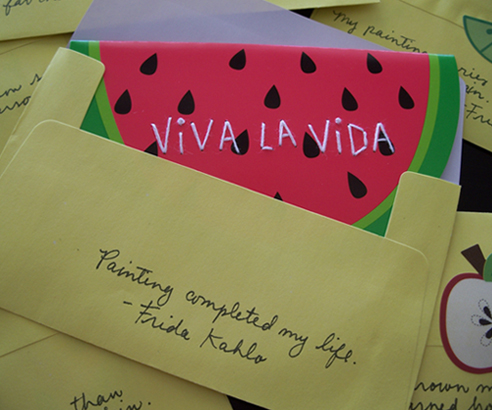
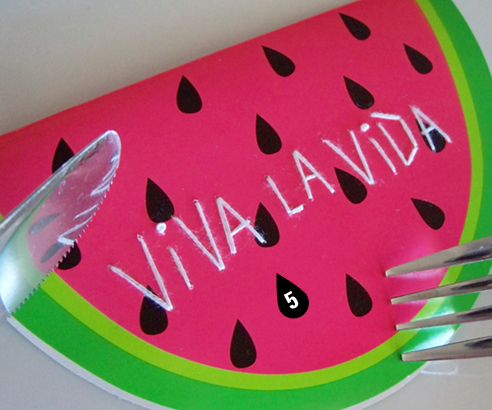
Frida Kahlo’s still life painting of watermelons inspired my birthday party invitations. Incorporating as many Frida and Mexican aspects to my party was my goal. Many beautiful objects made in Mexico are colorful and hand embroidered, I decided to take the embroidered part for my party invitations and embroider Viva La Vida on watermelon slice note cards.


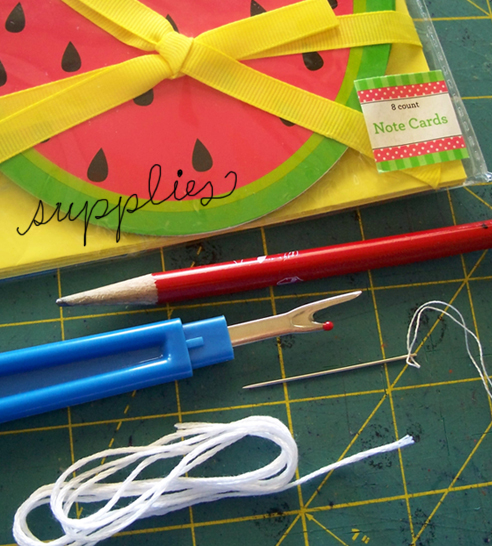
Supplies: watermelon slice note cards (got mine at Target), seam ripper, pencil, cutting board (or thick card board), white embroidery thread and needle.


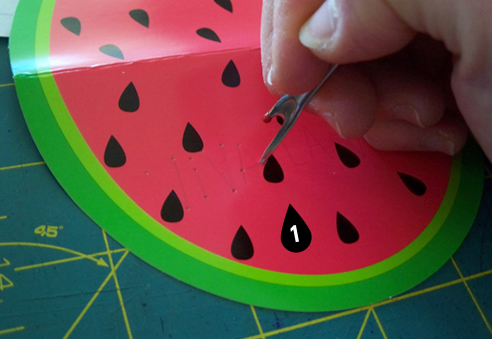
Slice 1: Open the card and write VIVA LA VIDA in all caps with your pencil on the front of watermelon note card.

Slice 2: Place card on cutting board and use your seam ripper to punch holes were each letter connects or curves.


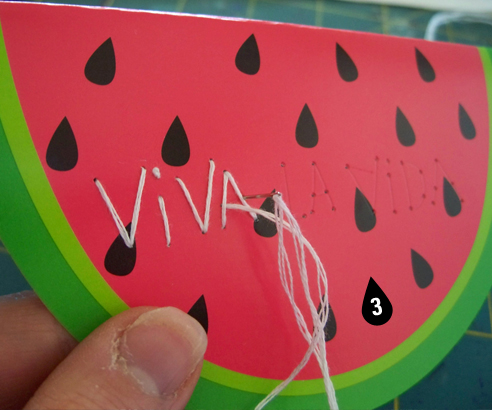
Slice 3: Using four strands, connect the dots with your embroidery thread and needle.  When you get to the i make a French Knot for the dot. First knot goes inside the card, stitch your words, and the last knot is also tied inside.


Slice 4 (Optional if not too full): Draw glove holding ribbon inspired by a self-portrait of Frida. Write guests name in ribbon. Behind each envelope write a quote by Frida. Seal envelopes with fruit stickers.


Slice 5: Enjoy (not that way, it’s not edible) mailing out the invitations or personally handing them out and seeing your guests’ reactions when they see how deliciously cool the invitations look.

October 5, 2011

D.I.Y. Guest Post at Paper Sparrow


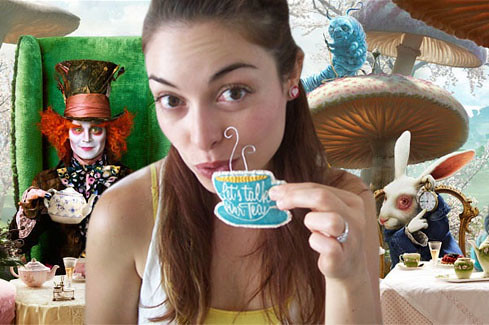
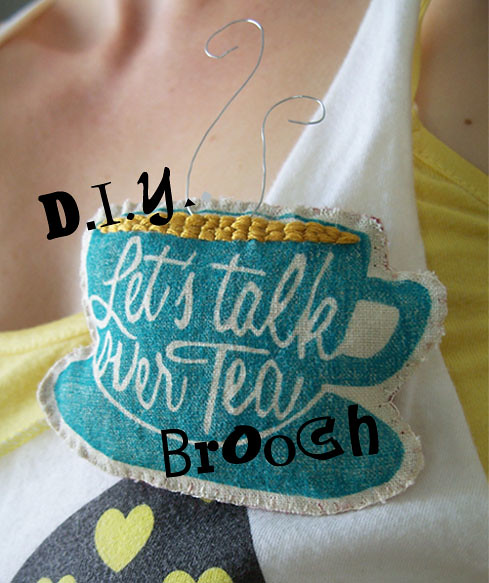
Party Time! Paper Sparrow one of my favorite blogs is having a Tim Burton blog party today and tomorrow. I am doing a guest post on how to make a “Let’s Talk Over Tea” brooch inspired by Alice in Wonderland movie tomorrow.


You can win the "Let's talk over Tea" brooch too but you have to head over to the party to enter. Like the white rabbit says, "Don't be Late."

January 19, 2011

Bloody Valentine Invitations


I made these Bloody Valentine invitations for my book club meeting next month. I got the month of February to choose a book and I chose Outside Valentine by Liza Ward.

How to make Bloody Valentine Invitations

Supplies:
red paper
thick junk mail flyer or any cardstock paper
alphabet stamps
black ink
red paint
paintbrush
scissors
plastic bags


1. Get a thick junk mail flyer or cardstock paper, fold it in half, and cut out a heart.

2. Now, you have a heart template; use it to trace your hearts onto red paper. Cut out your hearts.


3. Use alphabet rubber stamps to stamp on your message onto your hearts. Let the ink dry.


4. I suggest wearing an old t-shirt or an apron for this next step. Place your heart over a few plastic bags so you don’t get paint on your table. Wet your paintbrush then dip it into red paint. Use your finger to flick the hairs on the brush upward towards your heart invitation; this will cause the paint to splatter onto the invitation, giving it a spattered blood look to it.

5. Let the paint dry.

6. Add your meeting or party information on the back then add more splattered blood on it, if you like.

You can also use the splattered blood method on Halloween invitations too.
Related Posts Plugin for WordPress, Blogger...