Showing posts with label Halloween costume. Show all posts

October 27, 2013

The Giving Tree Costume

When I was in my book club, The Bookies, we celebrated our first year anniversary by dressing up as a character from our favorite book. One of my favorite books is, “The Giving Tree” by Shel Silverstein. If you haven’t noticed, I’m a big kid at heart. My favorite character in the book is the tree, not that there is many to choose from. I wrapped myself in brown construction paper and… okay, I’m kidding. I made my costume as simple as possible and it included everyone in the book, the tree and the boy. I won first place with this costume at book club.

Bag of Apples/Supplies: White shirt, black dimensional fabric paint, red, green, and brown felt, white fabric, polyester stuffing, hair tie, transfer sheets for ink jet printers, printer, scissors, small button, sewing needle, sewing machine, hot glue gun, embroidery thread, iron, scanner, and “The Giving Tree” book.
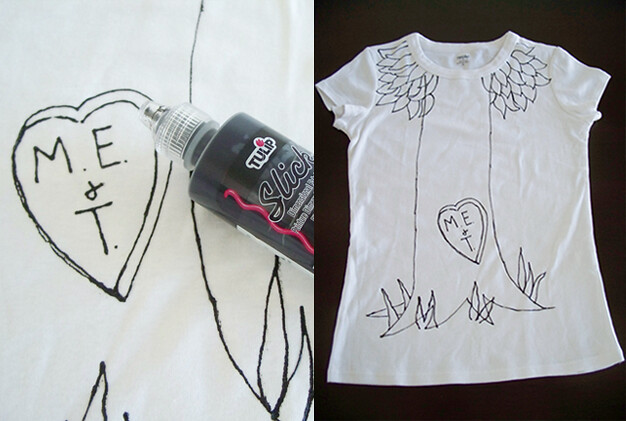
Apple 1: Draw your giving tree with dimensional fabric paint on your white shirt, with the leaves around the collar. Don’t forget the M.E. + T carved into the tree.
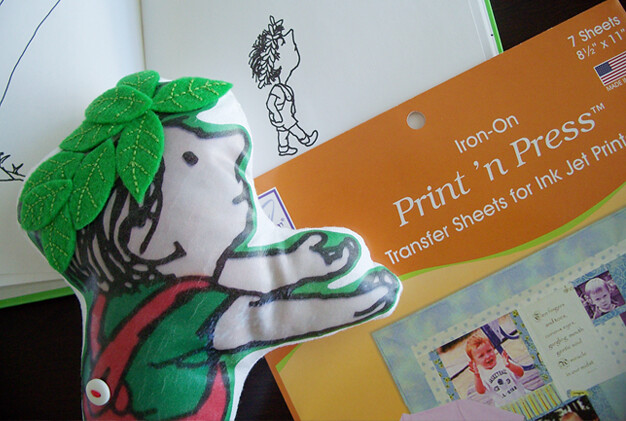
Apple 2: Scan the picture of the boy from the front cover of the book. It’s important to follow directions from the transfer paper. Print image on transfer paper and iron onto white fabric. Sew button on boy’s overalls. Cut fabric around boy.  Place it over another piece of white fabric, trace it, and cut the traced fabric out. Sew both pieces together with the image of the boy inside. Leave an opening to turn it inside out. Stuff your boy doll and hand sew the opening shut. Cut leaves out of green felt and embroider them with a lighter shade of green with embroidery thread. Glue the leaves to the boy’s head. Now, he has his little crown of leaves.
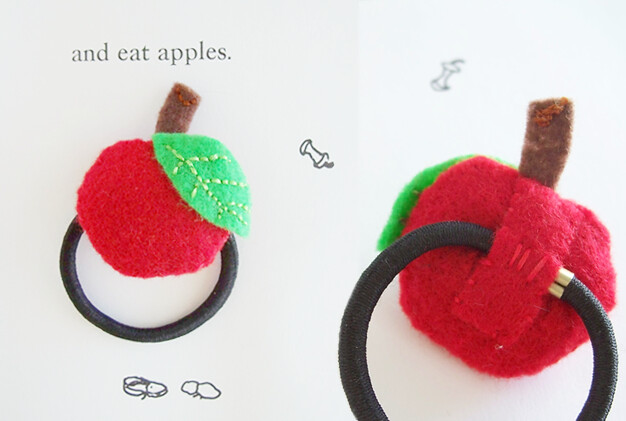
Apple 3: Make an apple with a leaf and stem using your felt. Sew the apple pieces together and stuff your apple. Cut a rectangular piece of red felt. Place it over the back of your apple with the hair tie between them, and sew it on the apple. Repeat this step if you would like to be a tree with many apples.

Apple 4: Put your tree shirt on, braid your hair (or wig if your hair is short) and tie your apple hair tie with it. Your hair will represent the tree’s branches with apples in them. Hold your boy and give him lots of love. Carry the book with you for those who need an extra hint to guess who you are for Halloween. If you have brown pants, wear them!

I don’t have a picture of myself in this costume. I don’t think I can fit into the shirt again and I’m rocking short hair now. I hope you can envision “The Giving Tree” costume put together by the pictures above. If you make this costume, I would love to see it. Please do share!

November 19, 2012

Halloween in Wonderland


For Halloween, I joined Amanda and Christi at High Desert Church, in Victorville, CA, to pass out candy for their Blocktober event. We passed out bags and bags of candy at the Trunk or Treat section.

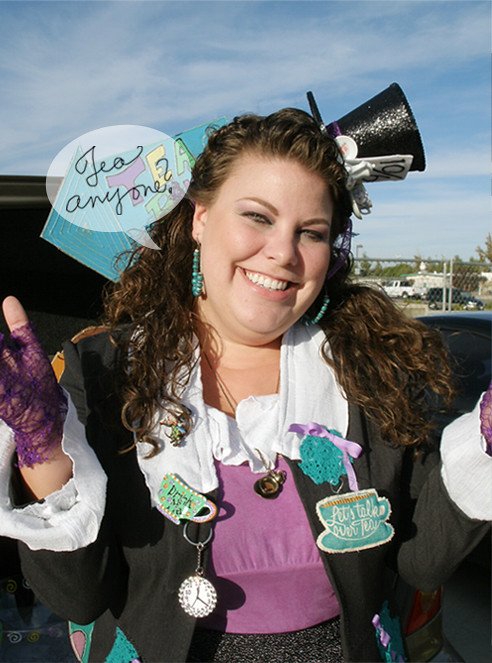
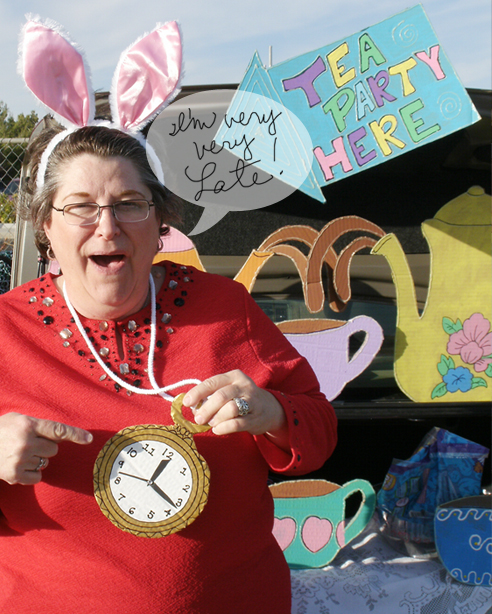
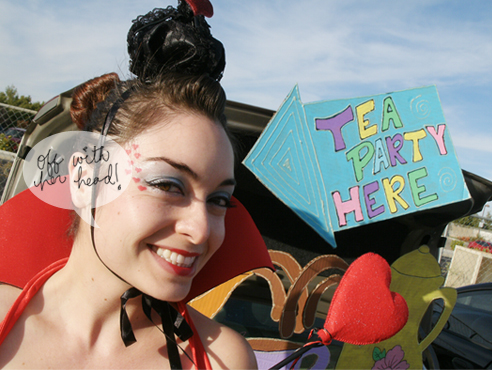
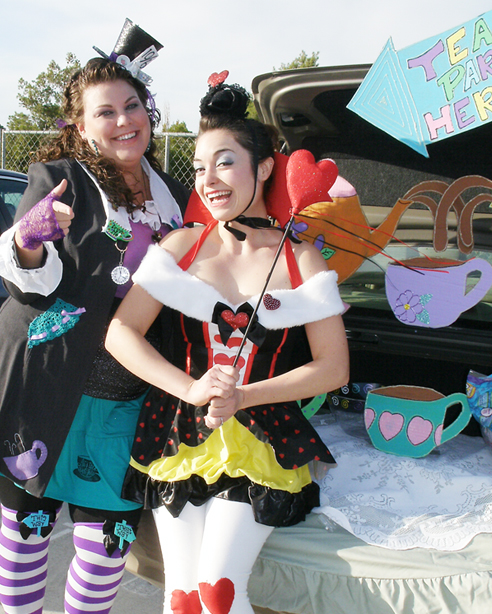
Amanda had mentioned that she wanted to be the Mad Hatter for Halloween and her mom Christi would be the White Rabbit with a fluffy tail and bunny ears for their church’s Halloween event. When they invited me to join, I suggested that we should decorate Amanda’s trunk in an Alice in Wonderland theme and I would dress up as the Queen of Hearts.


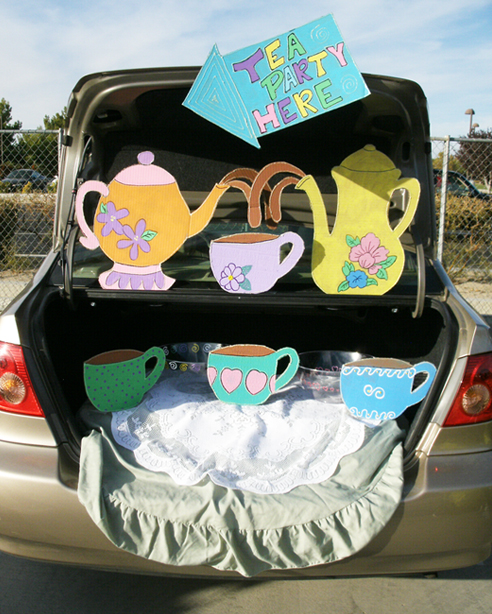
Amanda and I decided to decorate her trunk with teapots, teacups, and a “Tea Party Here” sign for a tea party theme. Amanda and I painted the cardboard decorations and Amanda out lined everything in glow in the dark puffy paint. Parents and their children enjoyed our themed trunk and asked us if we would take pictures with their children.


Amanda with the help of Christi made the Mad Hatter costume out of dresses Amanda wasn’t wearing any more. Amanda decorated her Mad Hatter hat and I stamped the bottom of her dress with my “Let’s Talk Over Tea” hand craved linoleum stamp. Amanda received many compliments on her homemade Mad Hatter costume. Christi’s White Rabbit costume was complete with a pocket watch Amanda made for her mom from cardboard and rope. My Queen of Hearts costume was an old costume I had already worn. The costume was too short and not appropriate for a church event so I wore white leggings and sewed felt hearts on the knees. I made the Queen of Hearts wand and was finally able to use it. The first time I wore the Queen of Hearts costume I forgot my homemade wand at home. I love the way accessories add more personality to costumes!

We had so much fun passing out candy and seeing people of all ages in different Halloween costumes. As we passed out candy, we keep throwing out ideas of what theme we should do next year. Maybe princesses, circus, bugs (butterfly, bee, and ladybug), peter pan…

I can’t wait for next years Blocktober event. Is it Halloween yet again?

November 15, 2012

Yee Haw with The Bookies


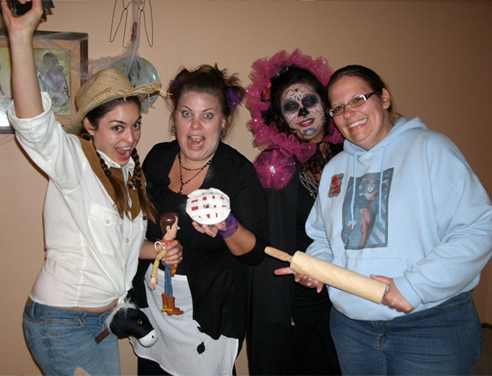
I know this is kind of late, but I recently got a hold of these pictures of us gals at October’s The Bookies book club meeting, that we had on Sunday, October 28th.

I really wanted to be a bumblebee for October’s book club. Due to lack of time, it didn’t happen. Maybe, I’ll be a bumblebee in February since I want to make Bee Mine Valentine’s Day cards.


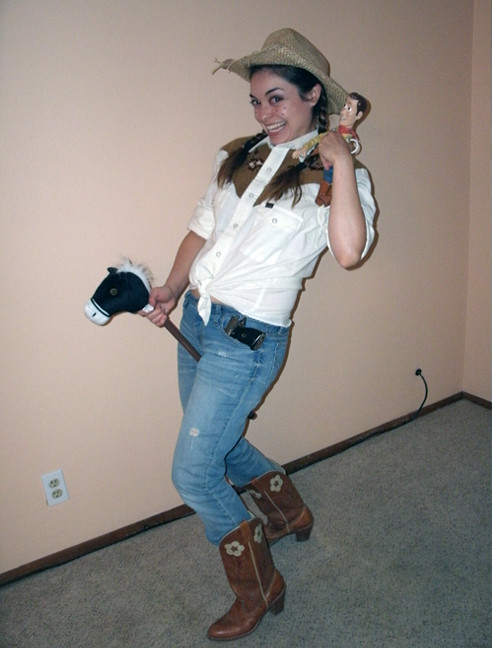
There was no way I was going to book club without a costume. Dressing up is the best part of Halloween! After you grow up, you seem not to care for candy as much anymore. The day before my book club meeting I had to search my closet and my Halloween tote in the garage to see what I could scrounge up. Surprisingly, I had everything at home to be a cowgirl.

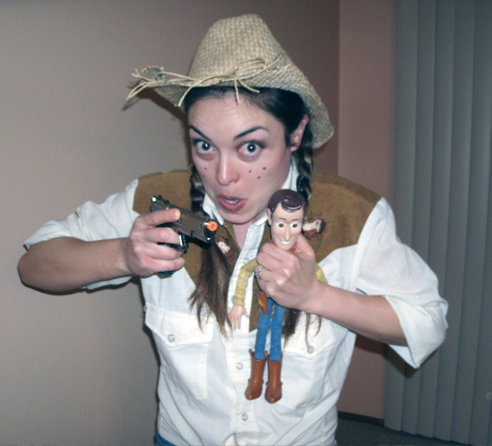
Disney’s Woody was sitting on my bookshelf; the Wrangler’s t-shirt was in the closet, which I got from my mom. The straw hat I got a few years ago at the 99 cent store just in case I ever wanted to be a cowgirl for Halloween. Sometimes you just have to think ahead. The boots were a gift for my aunt up north, who lives on a farm. I’ll be mailing her a picture of me as a cowgirl. I know she’ll get a good kick out of it. The horse on a stick (also from the 99 cent store) and toy gun (I got from a friend when he was moving out) I found in my Halloween tote. The tote stores my old Halloween costumes and many Halloween accessories, which I purchased for guests to wear if they didn’t come in a costume for one of my Halloween parties.


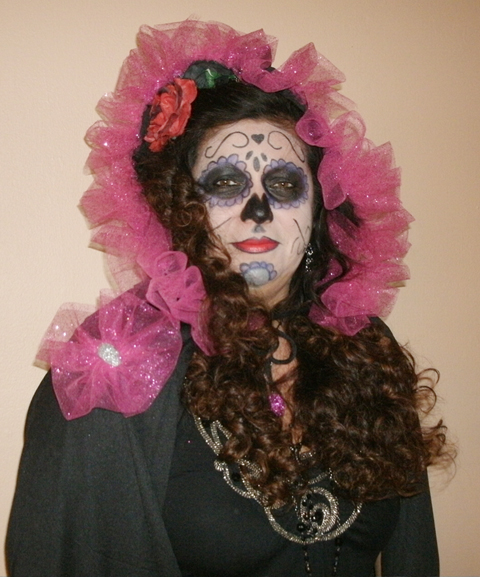
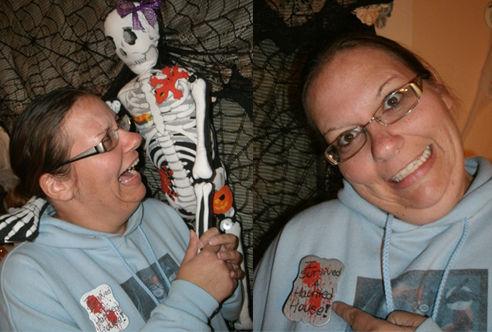
Amanda dressed up as Mrs. Lovett, with her meaty pie. Regina’s costume was inspired by the Day of the Dead, and Amy wore an “I survived a Hunted House” pin, made by Amanda. Amy actually did survive a hunted house! Okay, maybe not a real one. Amy writes for our local newspaper and had to write a review on a fake hunted house.

All the Bookies costumes were homemade. Yee Haw, for homemade costumes!

September 18, 2012

DIY Psycho Shower Scene Costume


Here's another guest post I did last year for Paper Sparrow. This time it was...Yes, you guessed it, an Alfred Hitchcock themed blog party. For those looking for a unique Halloween costume or some inspiration for the Halloween Costume Swap, I hope this helps.

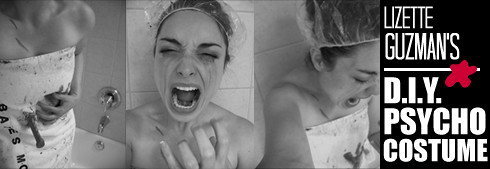
 I’ve seen two of Alfred Hitchcock’s movies, “Psycho” and “The Birds.” The scenes that stand out the most are when someone is being attacked, either by a serial killer or by, of course, birds. With Halloween a few days away, I, Lizette from Creativity Lizette, decided to share an easy way to make a Marion Crane costume inspired by the famous shower scene from “Psycho.” Viewer discretion is advised for bloodlines and extreme creativeness!

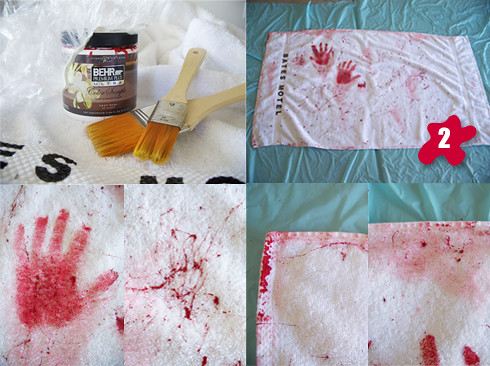
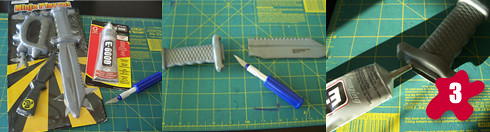
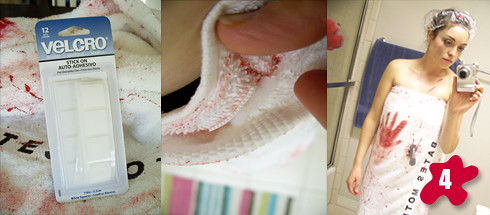
Supplies: White towel with trim, shower cap, alphabet stamps, black Speedball Oil-Based Printing Ink/fabric paint, red wall paint, paintbrushes, plastic toy knife, exacto knife, E-6000 glue, and stick on Velcro.


Stab 1: Wrap white towel around you and look in the mirror to see where you would like to stamp the words Bates Motel. Lay stamps on trim of towel and beginning stamping. Let towel dry.


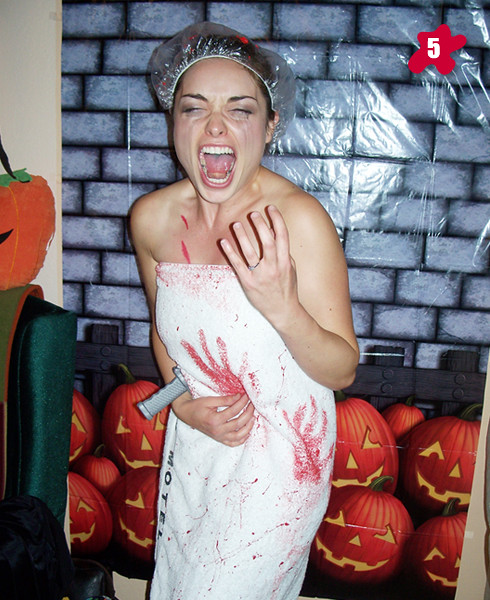
Stab 2: Painting time. Lay towel and shower cap on floor somewhere where Mother won’t get mad if you make a mess. To make bloody hand prints paint hand with paintbrush, stamp hand on towel, and slide hand off the towel. Stamp one hand at a time to keep a clean hand free. To make blood splatter marks dip paintbrush in red paint and pull brush hairs towards you. Some fingers will have paint on them. Use the painted fingers to paint all the edges of the towel. Before you wash your paintbrush use it to brush on light blood marks. Let towel dry.


Stab 3: Very carefully, cut handle off plastic toy knife with an exacto knife. Glue knife handle where desired.


Stab 4: Add three sticking pieces of Velcro on the top of the towel. Velcro both sides of the towel near the armpits and Velcro the middle. We don’t want the towel falling off.


Stab 5: Put on your shower cap and bloody Bates Motel towel and be thrilled that you survived another Halloween without spending big bucks on a costume!

I hope you like this easy D.I.Y. costume and don’t be afraid to take a stab at it!
 Also, don't forget to sign up for the Jack Oh! Lantern necklace giveaway!
Related Posts Plugin for WordPress, Blogger...