When I was in my book club, The Bookies, we celebrated our first year anniversary by dressing up as a character from our favorite book. One of my favorite books is, “The Giving Tree” by Shel Silverstein. If you haven’t noticed, I’m a big kid at heart. My favorite character in the book is the tree, not that there is many to choose from. I wrapped myself in brown construction paper and… okay, I’m kidding. I made my costume as simple as possible and it included everyone in the book, the tree and the boy. I won first place with this costume at book club.
Bag of Apples/Supplies: White shirt, black dimensional fabric paint, red, green, and brown felt, white fabric, polyester stuffing, hair tie, transfer sheets for ink jet printers, printer, scissors, small button, sewing needle, sewing machine, hot glue gun, embroidery thread, iron, scanner, and “The Giving Tree” book.
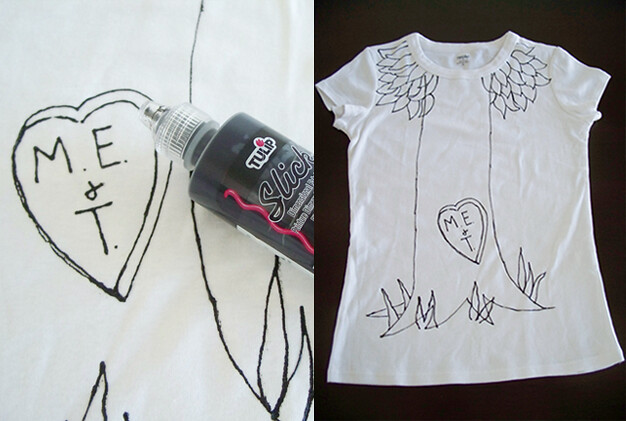 Apple 1: Draw your giving tree with dimensional fabric paint on your white shirt, with the leaves around the collar. Don’t forget the M.E. + T carved into the tree.
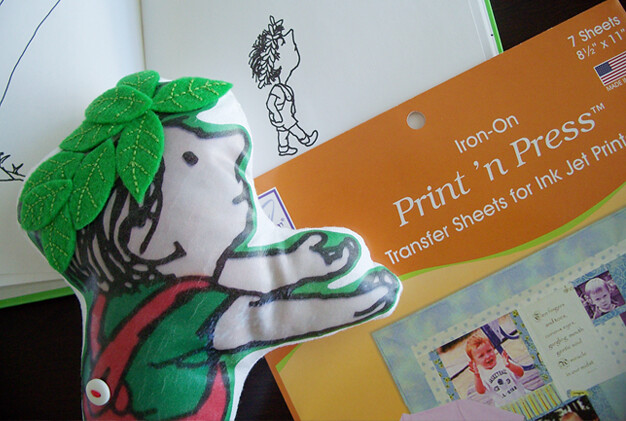 Apple 2: Scan the picture of the boy from the front cover of the book. It’s important to follow directions from the transfer paper. Print image on transfer paper and iron onto white fabric. Sew button on boy’s overalls. Cut fabric around boy. Place it over another piece of white fabric, trace it, and cut the traced fabric out. Sew both pieces together with the image of the boy inside. Leave an opening to turn it inside out. Stuff your boy doll and hand sew the opening shut. Cut leaves out of green felt and embroider them with a lighter shade of
green with embroidery thread. Glue the leaves to the boy’s head. Now, he
has his little crown of leaves.
Apple 2: Scan the picture of the boy from the front cover of the book. It’s important to follow directions from the transfer paper. Print image on transfer paper and iron onto white fabric. Sew button on boy’s overalls. Cut fabric around boy. Place it over another piece of white fabric, trace it, and cut the traced fabric out. Sew both pieces together with the image of the boy inside. Leave an opening to turn it inside out. Stuff your boy doll and hand sew the opening shut. Cut leaves out of green felt and embroider them with a lighter shade of
green with embroidery thread. Glue the leaves to the boy’s head. Now, he
has his little crown of leaves. 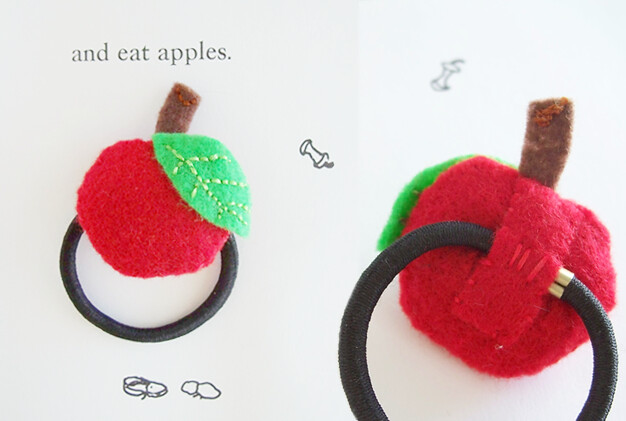 Apple 3: Make an apple with a leaf and stem using your felt. Sew the apple pieces together and stuff your apple. Cut a rectangular piece of red felt. Place it over the back of your apple with the hair tie between them, and sew it on the apple. Repeat this step if you would like to be a tree with many apples.
Apple 4: Put your tree shirt on, braid your hair (or wig if your hair is short) and tie your apple hair tie with it. Your hair will represent the tree’s branches with apples in them. Hold your boy and give him lots of love. Carry the book with you for those who need an extra hint to guess who you are for Halloween. If you have brown pants, wear them!
I don’t have a picture of myself in this costume. I don’t think I can fit into the shirt again and I’m rocking short hair now. I hope you can envision “The Giving Tree” costume put together by the pictures above. If you make this costume, I would love to see it. Please do share!