
Supplies:
Image,
Laminating Machine
Scissors,
Felt,
Pin back,
Pen/Sharpie
Glue Gun
1. Design your image and print it out. My image was 2” x 3”. Don’t use photo paper like I did because the laminating machine will melt the ink off the paper as you can see from the bottom right laminated picture.

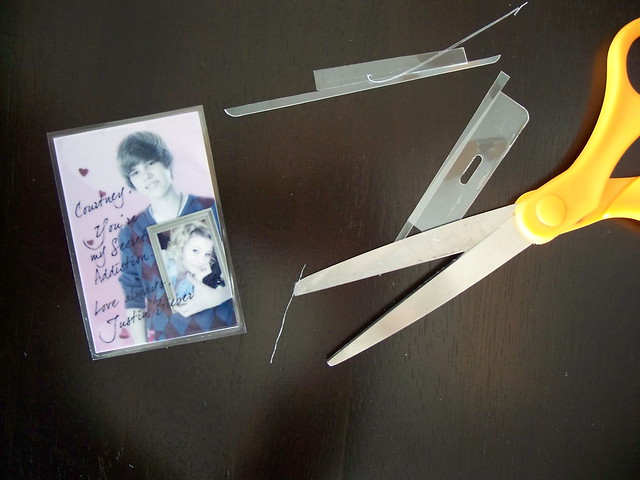
3. Now, that your image is laminated cut off the excess plastic you don’t want on your pin.

4. Cut a rectangle out of your felt bigger than the pin back as shown in the picture. Place the pin back on your felt and make four marks above and under the last circles of your pin back. Fold your felt horizontally and cut the marks you made vertically, connecting one mark to the other. You should have two small slits. Put this piece aside.

5. Position your pin back behind the laminated image and use a Sharpie to mark the inside of the circles. Remove your pin back, put glue over the marks, grab your pin back (make sure it is open), and press it down onto the glue.
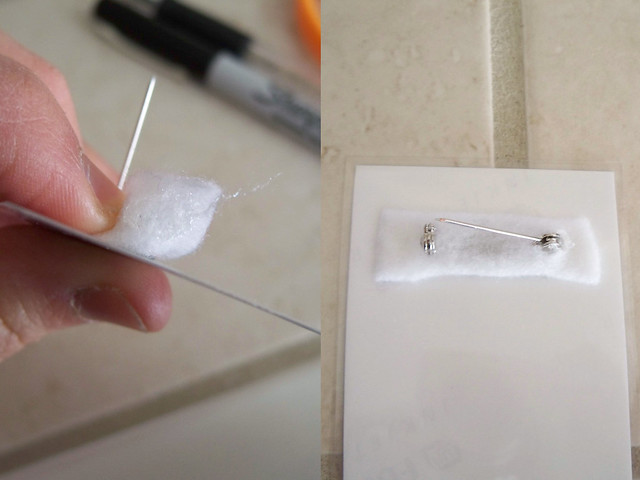
6. Place glue on the top of the circles of your pin back, grad your rectangle piece of felt with the cleaned side (without the marks) facing towards you, and position it over the pin back with the ends of the pin back sticking out through the slits. Clue the ends of the felt for extra support.
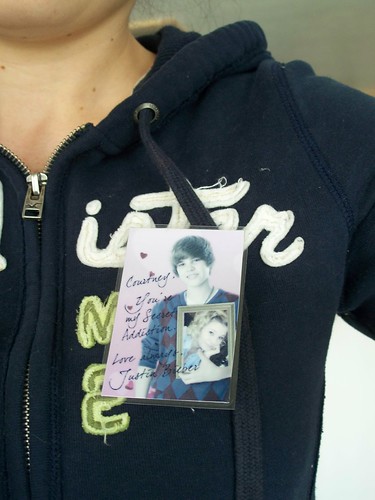
7. You’re done! Wear it proudly!
Don’t forget to sign up for my book giveaway; the last day is February 13!
-->
It’s really amazing how lamination can be such a great help in making custom pins like this. This idea is pretty cool. I’d like to laminate the pictures of my favorite artists with their sign on it too. Thanks for sharing this! ->Pa Byars
ReplyDelete